Overview
| Top |
|
Using Jaspersoft Studio with LabVantage |
Overview |
|
|
This document provides an example configuration of TIBCO Jaspersoft Studio for use with the LabVantage application.
Installing Jaspersoft Studio |
|
|
If you do not have Jaspersoft Studio, you can download the Community Edition at https://community.jaspersoft.com/download. Install according to Jaspersoft's recommendations, then run the installer. Tests have shown that accepting all defaults works in most cases.
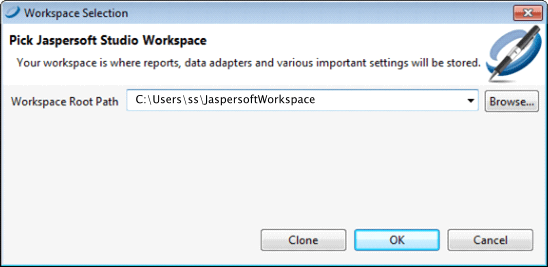
After launching Jaspersoft Studio, create a Workspace if prompted to do so. The Workspace is where your Reports and other files will be stored.
|
Creating a Data Adapter |
|
|
A data adapter (also known as a "data source") is required to connect to the LabVantage database. An Oracle DBMS is used in these examples.
| 1. | Create a directory where a copy of the Report templates, JDBC driver,
and sapphire.jar will be stored (such as C:\Users\[user]\ReportsLibrary).
Copy these files to the directory you have just created:
|
|||||||||||||
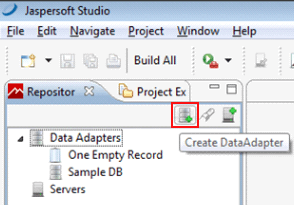
| 2. | In the Jaspersoft Studio Repository Explorer window, create a new Data
Adapter by clicking the first button on the left.
|
|||||||||||||
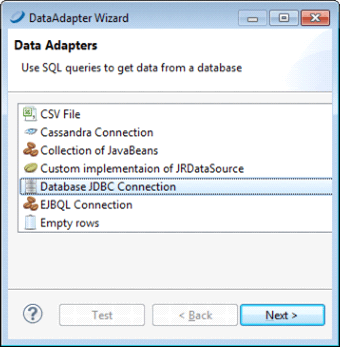
| 3. | In the Data Adapter Wizard, choose "Database JDBC Connection",
then click "Next".
|
|||||||||||||
| 4. | Set the connection properties:
|
|||||||||||||
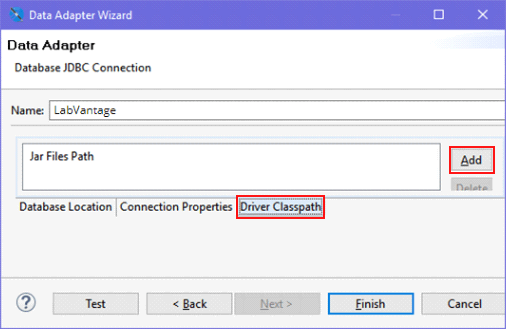
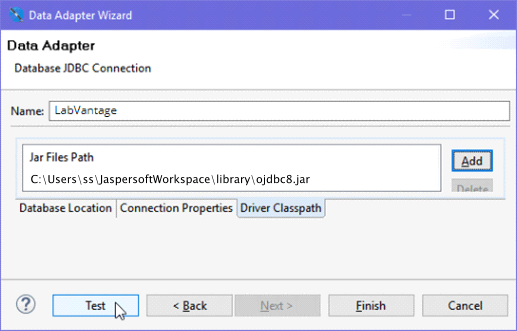
| 5. | Click the "Driver Classpath" tab, then click the "Add"
button.
|
|||||||||||||
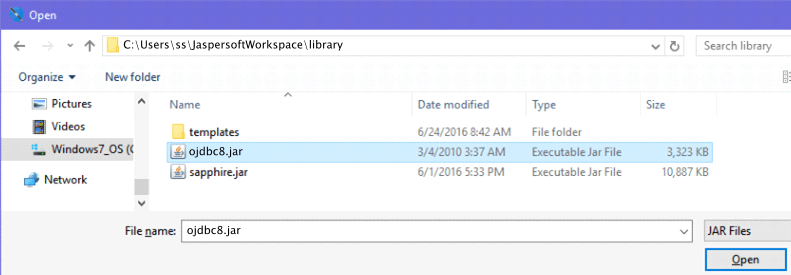
| 6. | Browse to the location of your files in the directory you created in
step 1. Select the JDBC driver, then click "Open".
|
|||||||||||||
| 7. | Click the "Test" button. A success message should be returned
if you have successfully established a connection to your database. If this
is the case, click "Finish".
|
Configuring a Project |
|
|
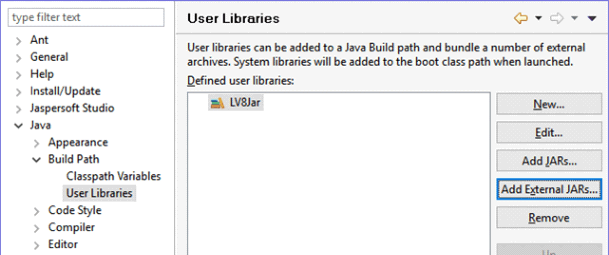
When you compile a report in Jaspersoft Studio, the Report may contain references to some Java classes that are defined in the sapphire.jar file. This is especially true with regard to OOB Reports and Reports that use the LabVantage template. You must add a reference to the classpath in order to successfully compile such Reports.
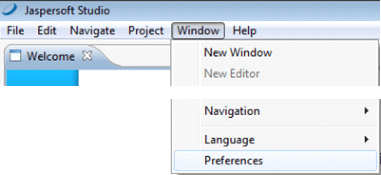
| 1. | Select Window → Preferences.
|
|
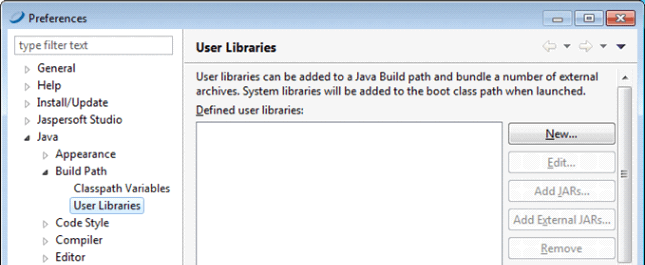
| 2. | On the left, select Java → Build Path → User Libraries, then
click the "New" button on the right.
|
|
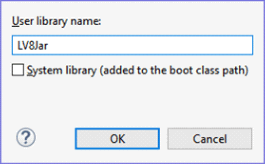
| 3. | Enter an arbitrarily-chosen new User Library Name (DO NOT check
"System library"), then click OK.
|
|
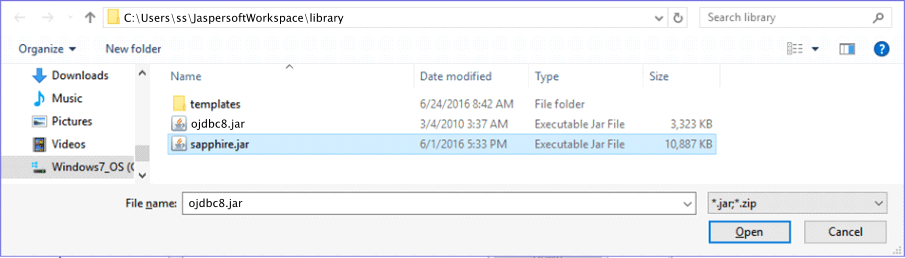
| 4. | Click "Add External JARs".
|
|
| 5. | Browse to the location of your files in the directory you created in
step 1. Select sapphire.jar, then click "Open".
|
|
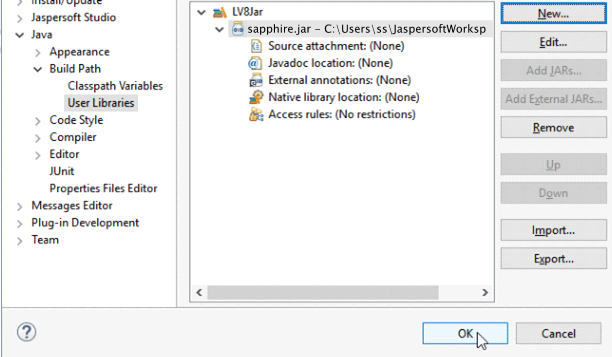
| 6. |
Click OK.
|
|
| 7. | You will now create a project that refers to the library you have created.
Select File → New → Project.
|
|
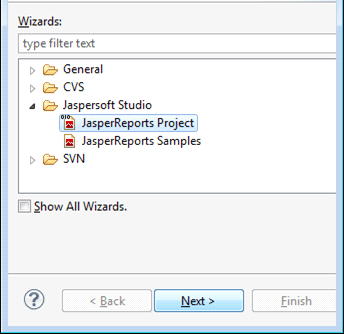
| 8. | In the New Project Wizard, expand "Jaspersoft Studio", select
"JasperReports Project", then click "Next".
|
|
| 9. | Enter a new arbitrarily-chosen JasperReports Project Name, then click Finish. | |
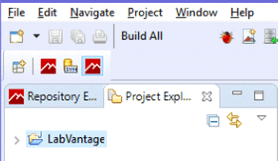
| 10. | Click the Project Explorer tab, right-Click your Project, then select
Properties.
|
|
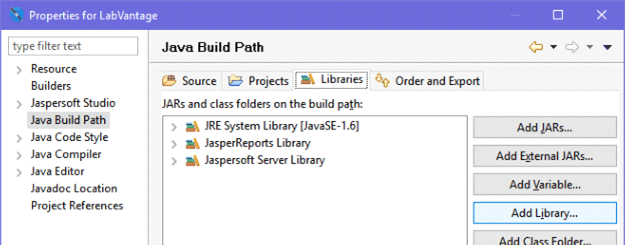
| 11. | Select "Java Build Path", click the "Libraries" tab,
then click "Add Library".
|
|
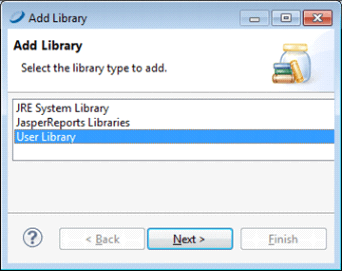
| 12. | Choose "User Library", then click Next.
|
|
| 13. | Select your User Library, click "Finish", then click OK. Your library has now been added to this project. |
Importing LabVantage Templates into your Library |
|
|
This allows you to work with the LabVantage templates.
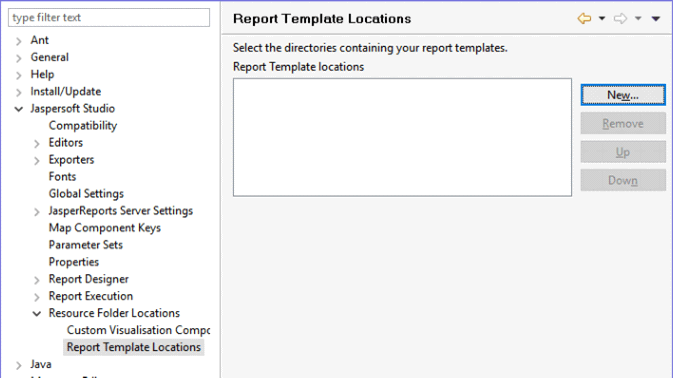
| 1. | Navigate to Window → Preferences. Expand Jaspersoft Studio and select
"Report Template Locations" (this may be labeled differently depending
on the version of Jaspersoft Studio in use). Click New.
|
|
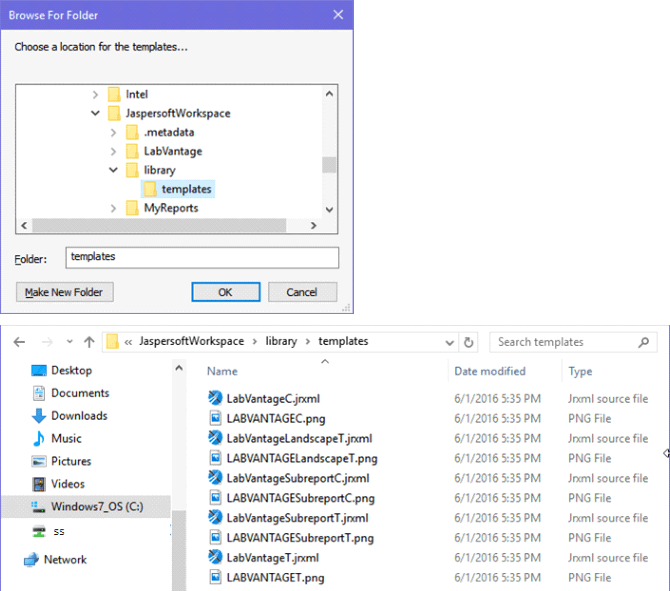
| 2. | Expand the tree until you find the directory in which you copied the
template files in step 1 of Creating a Data
Adapter, then click OK.
|
|
| 3. | Click OK again (this should close the Template Locations Preferences window). |
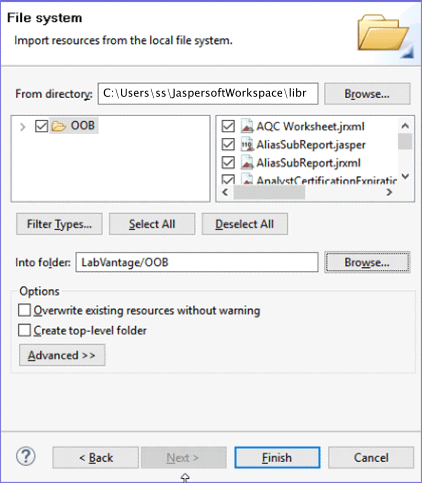
Importing LabVantage OOB Reports into a Project |
|
|
This lets you modify OOB Reports provided by LabVantage. The original Reports can be imported to serve as the starting point for a new Report rather than starting from scratch.
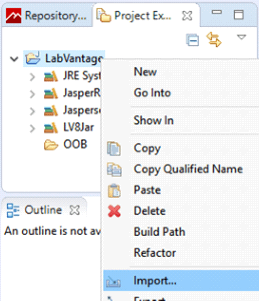
| 1. | In Jaspersoft Studio, select the Project Explorer window.
Right-click your project, select "New", then select "Folder". Enter an arbitrarily-chosen folder name, then click "Finish". Right-click your project again, then click "Import".
|
|
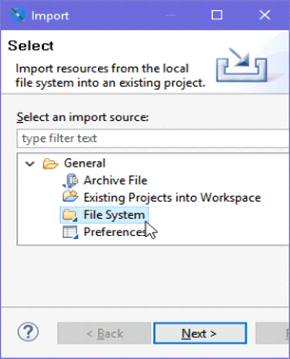
| 2. | Under General, select "File System", then click "Next".
|
|
| 3. | In "From directory", browse to the location on your local machine
where the OOB Reports are stored. In the left window, select the folder
(or choose individual Reports to import). Choose your project and the OOB
folder you created above as the "Into folder" location. Click
Finish.
|
|
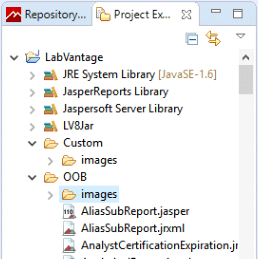
| 4. | Verify that you also have an images subdirectory as a result of your
import (see example below). If not, you must create an images folder and
import the images files in order to compile the OOB Reports.
|
|
| 5. | You have now finished installing and configuring Jaspersoft Studio. You should be able to create reports that can be run from within LabVantage after installing them into a LabVantage database. This is covered in the next section. |
Using the Wizard to Create a New Report |
|
|
The data source created in Creating a Data Adapter is now used to allow Jaspersoft Studio to retrieve data from the LabVantage database. This example shows a very simple Report created using the Report Wizard.
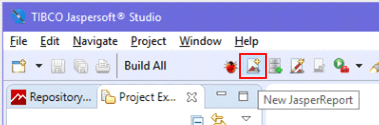
| 1. | Click the New JasperReport button.
|
|
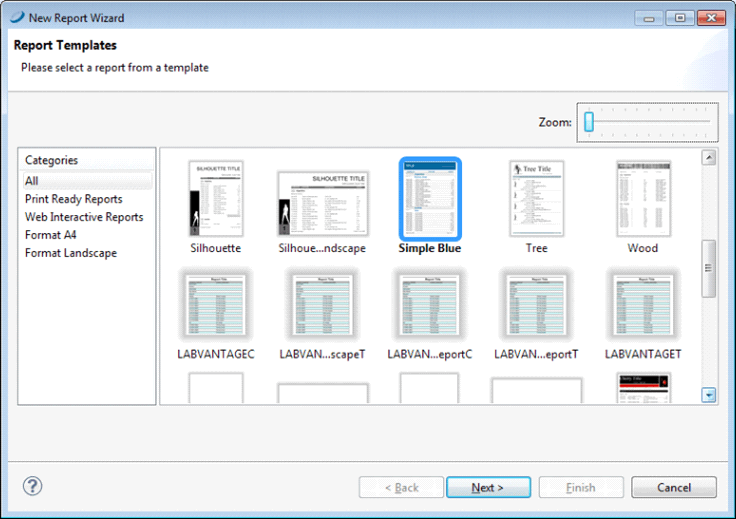
| 2. | The wizard asks you to choose a template. As you scroll through the Report
templates, you should see among them the five LabVantage templates that
you copied in step 1 of Creating a Data
Adapter. Choose a template, then click Next.
|
|
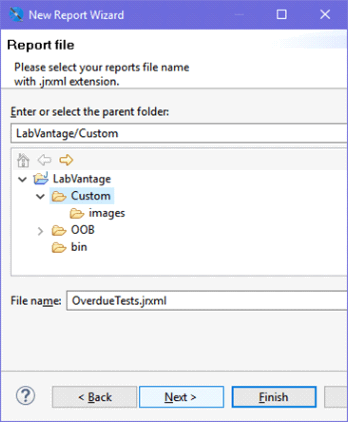
| 3. | Choose a location and enter a name.
Use the location of your Jaspersoft Studio project. If you created a Custom folder, choose it now. Enter the name of the Report (this example uses OverdueTests.jrxml). This report will query the database for Tests that are past their DueDt. You will define the query on the next page of the wizard. Click Next.
|
|
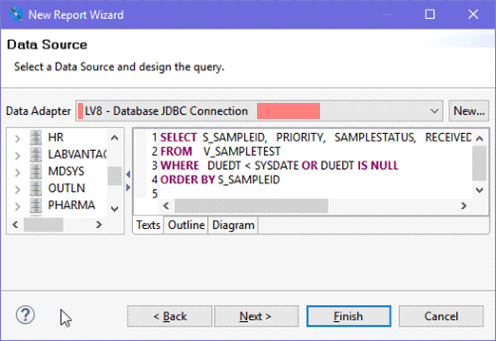
| 4. | Define the query that will be used by the Report to retrieve data from
the database. Make certain your data source is selected here, then enter
the SQL statement into the Query (SQL) area:
In this example, the following query is used: SELECT S_SAMPLEID, PRIORITY, SAMPLESTATUS, RECEIVEDDT, DUEDT, WORKITEMID, S_ASSIGNEDANALYST FROM V_SAMPLETEST WHERE DUEDT < SYSDATE OR DUEDT IS NULL ORDER BY S_SAMPLEID |
|
| 5. | Determine the fields you want on the Report. In this example, you can use all of the columns from the query as fields on the Report. Click the >> button between the columns to move everything from the left to the right. Click Next to continue. | |
| 6. | Leave all "group by" fields blank. You need not change anything in the next step the wizard. Click Next to continue. The wizard is now complete. Click Finish to view the design of the Report. | |
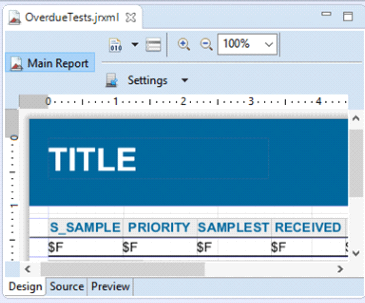
| 7. | Click Preview to see the Report.
|
PDF/A Support for Jasper Reports |
|
|
With regard to PDF/A support, Jasper Reports 6.3.1 supports only the PDF/A-1 standard. A generated Jasper Report can be made to comply with the PDF/A standard by modifying the .jrxml file as follows:
| 1. | Set PDF/A Conformance:
<property name="net.sf.jasperreports.export.pdfa.conformance" value="pdfa1a" /> |
||||||||
| 2. | Set ICC Profile:
Download the .icc file (sRGB profiles ) and set the path of the icc profile in the value attribute as in the example below: <property name="net.sf.jasperreports.export.pdfa.icc.profile.path" value="ICC_Profile\srgb.icc" /> |
||||||||
| 3. | Include structure tags for PDF/A-1a compliance (this is unnecessary for
PDF/A-1b):
<property name="net.sf.jasperreports.export.pdf.tagged" value="true" /> |
||||||||
| 4. | Set tag language (unnecessary for PDF/A-1b):
<property name="net.sf.jasperreports.export.pdf.tag.language" value="en-us"/> |
||||||||
| 5. | Set the default font to overcome this error: com.lowagie.text.pdf.PdfXConformanceException:
All the fonts must be embedded. This one isn't: Helvetica. This can be done as follows:
|
||||||||
| 6. | In the .jrxml file, images that contain transparent elements must be
marked with a key (such as TransparentImage) as in this example:
These images will be removed from export with a configuration property as shown in the example below because they are not supported by this standard. Set the configuration property the .jrxml file to exclude transparent images by either leaving the value blank or setting it with the key: <property name="net.sf.jasperreports.export.pdf.exclude.key.TransparentImage" value=""/> |
||||||||
| 7. | Save or download the generated PDF Report and open it. Ensure that a
message is displayed at the top of the screen to this effect:
This file claims compliance with the PDF/A standard and has been opened read-only to prevent modification. |
Using Unicode in Jasper Reports |
|
|
OOB Jasper Reports support Unicode using Google Noto Fonts. The LabVantage implementation is LV-Noto.jar, which is included in LABVANTAGE_HOME (LABVANTAGE_HOME\applications\APPLICATION_HOME\reports\lib\fonts\LV-Noto.jar).
Rich Text Support in Jasper Reports |
|
|
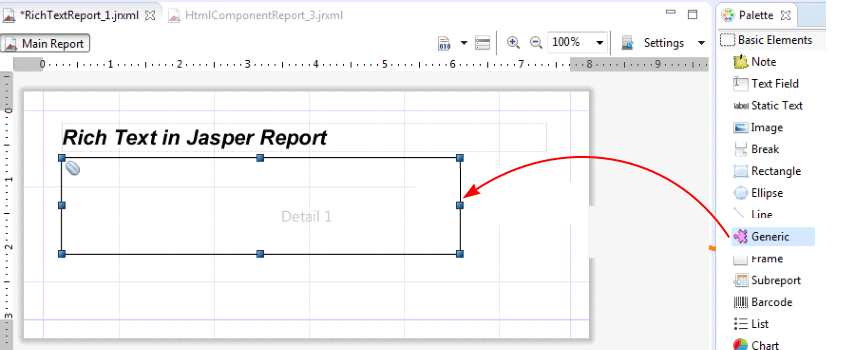
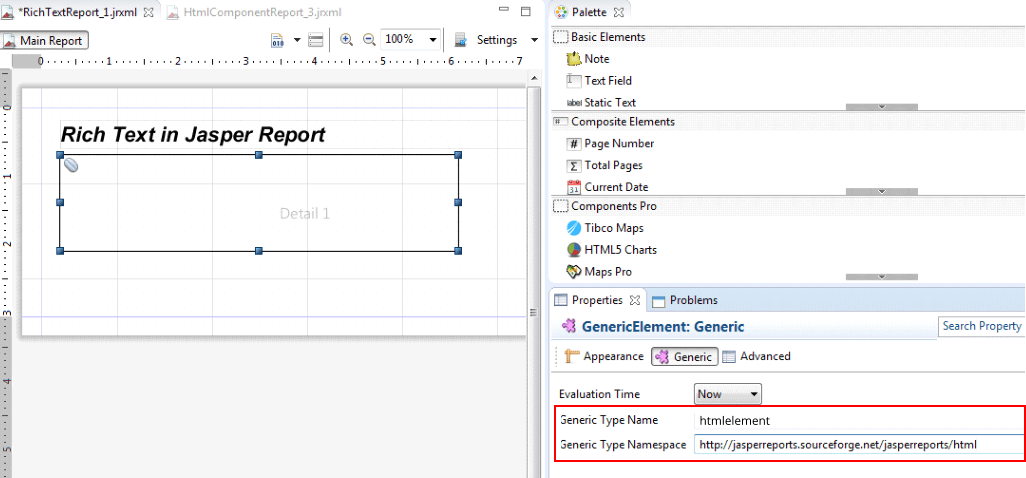
To render rich text in a Jasper Report, use the "Generic" element as the htmlelement.
| 1. | Drag and drop the "Generic" element to the location where you
want to display the rich text as shown below.
|
|
| 2. | Configure the Generic element to use htmlelement as shown below.
For the "Generic Type Name", enter htmlelement. For the "Generic Type Namespace", enter http://jasperreports.sourceforge.net/jasperreports/html. |
|
| 3. | Configure the field to be displayed through htmlelement in the Jasper
Report as shown below.
|