Overview |
|
|
|
Map Interface |
Sample collection points can often be pinpointed to an exact location using specific coordinates. These collection points can be spread out across large areas (such as lakes, rivers or land). The Map Interface makes it easy to find these Sample Points by displaying them on a map. The source of the map can be defined as Open Street Maps, Bing Maps (token required from Microsoft), a WMTS (Web Map Tile Service) map or a Web Map Service (WMS) map.
To specify coordinates in LabVantage you must first identify the SDCs for which you would like to add coordinates ("Allow Coordinates" in the Definition/Options tab of the SDC), then define the Coordinates at the SDI level. OOB, Sample Points are defined with "Allow Coordinates" checked.
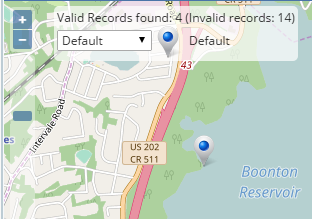
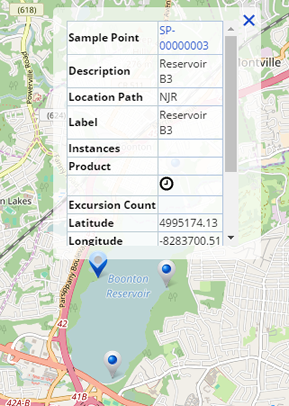
When coordinates are defined, a "Map View" is available as an option within the SDC list page. Within the map, each coordinate is marked with a customizable icon (pin). Hovering over the pin displays details (same information as in the list page) about the specific SDI associated with these coordinates (such as a Sample Point).
Optionally, choose to display extra information. For example, the OOB Sample Point view shows information from the last Sample taken from the Sample Point. This is configurable using the Map Policy.
| NOTE: | This document uses the Sample Point SDC for discussion purposes however "Allow Coordinates" is available for any SDC. |
Define Coordinates |
|
|
Clicking "Add" opens the Add Sample Point page.
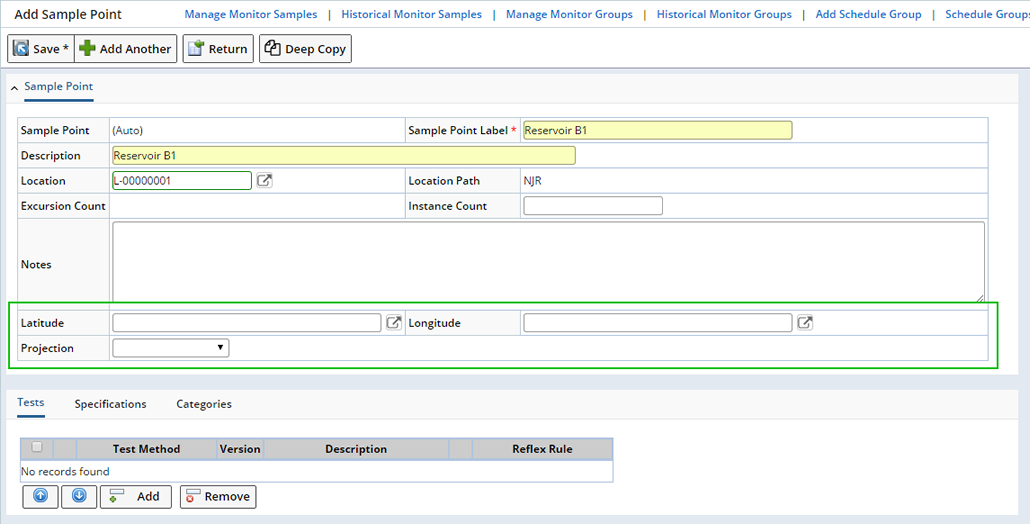
See Sample Point for information about the fields and operations on the Add Sample Point page.
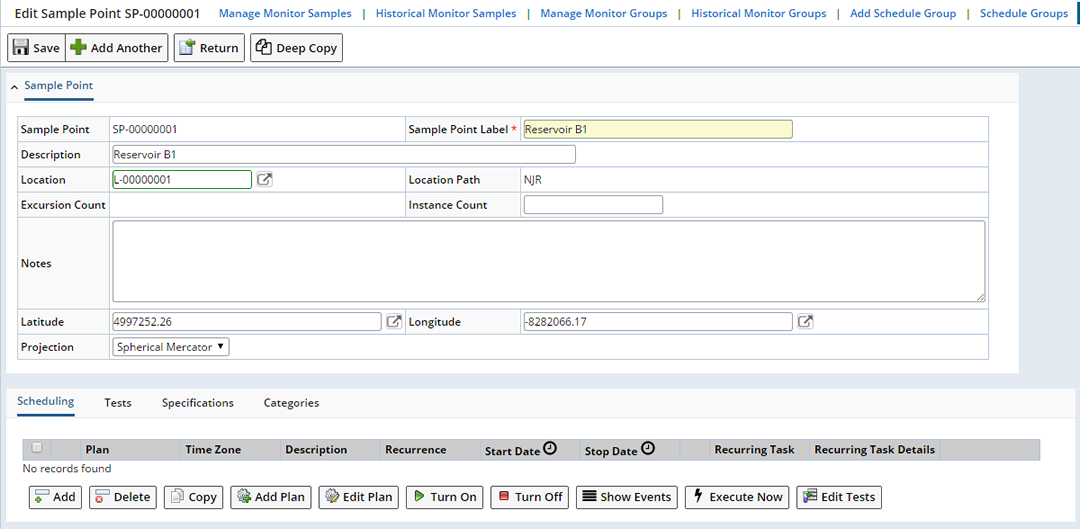
Use the following fields to define Coordinates for this Sample Point.
| Field | Description |
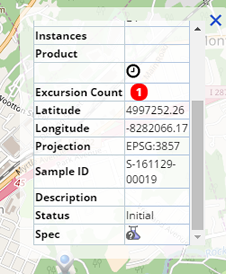
| Latitude | The Latitude (used with Longitude) determines the specific location of the Sample Point on a map. Choose to manually enter a specific latitudinal value, or use the lookup to open a map where you can specify (by clicking) the location. Upon selecting a location, the Latitude (and Longitude) is filled. |
| Longitude | The Longitude (used with the Latitude) determines the specific location of the Sample Point. Choose to manually enter a specific longitudinal value, or use the lookup to open a map and where you can specify (by clicking) the location. Upon selecting a location, the Longitude (and Latitude) is filled. |
| Projection | Defines the Coordinate Reference System to be used (such as Spherical Mercator). Reference Types define the available Projections. The Map Policy defines the different Projections and any necessary conversions for the Projection. |
Lookup Coordinates |
Clicking the lookup for either "Latitude" or "Longitude" opens the Lookup Coordinates dialog. Clicking in the map (at the specific place you want to place the Pin) fills in the coordinates for that specific location. The Latitude, Longitude and Projection values display.
| NOTE: | If LabVantage is running on a secure server and the browser allows geolocation, a geolocation button is shown next to the lookup icon. Clicking this button will use the browser API to set the coordinates to the location of the user. |
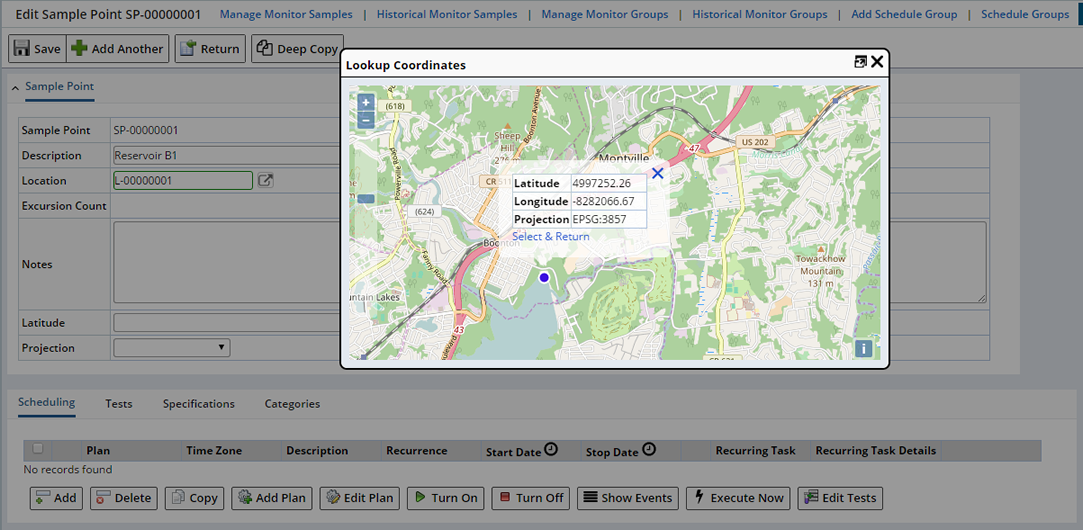
Click "Select & Return" to fill in the values.
View Samples Points on the Map |
| |
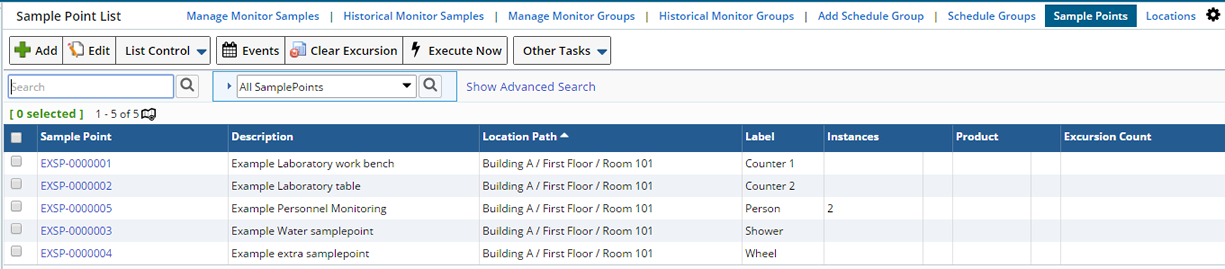
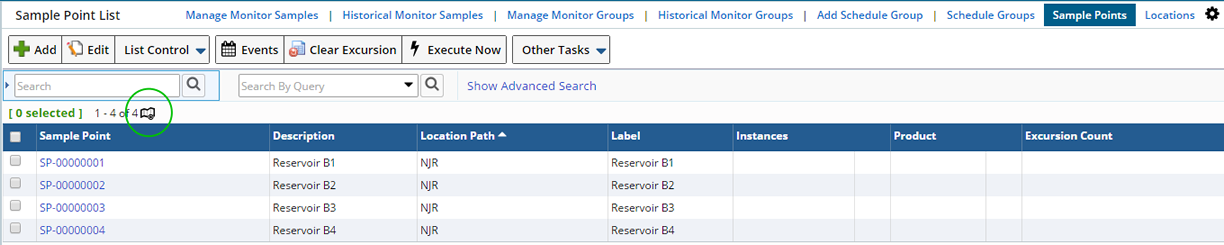
Navigate to LIMS → Monitor Samples → Sample Points. The Sample Point List page displays. Use the Map Icon ![]() to open the Map Interface.
to open the Map Interface.
Clicking the Map Icon ![]() switches to the Map view (click the List icon
switches to the Map view (click the List icon ![]() to return to the list view).
to return to the list view).
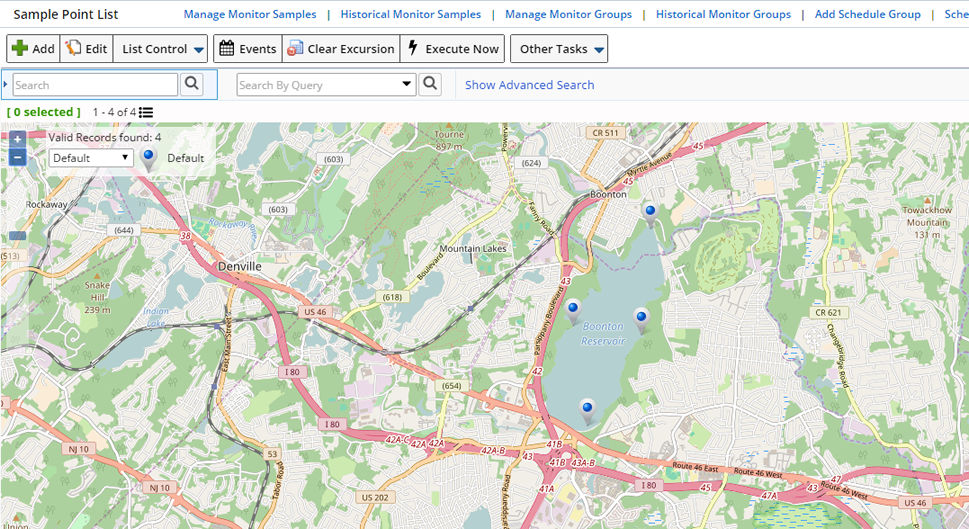
The Sample Points are plotted on the map. Hovering over the pin icon displays details about the Sample Point. Clicking a pin will select the SDI (the same as clicking a checkbox in the list page).
To select multiple pins use Ctrl + click to draw a rectangle around the pins you want to select. If using a touch enabled device the map can be zoomed or rotated using a two finger pinch, rotate gesture.
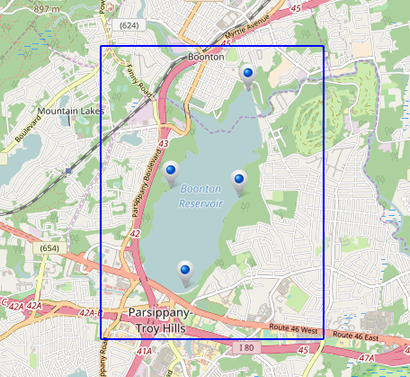
Normal toolbar operations can be performed on the selected items. For example, selecting a group of pins, then clicking "Execute Now", executes the plan for the selected pins (Sample Points). A confirmation message displays with a link to the Monitor Samples List page where the newly created Samples are displayed.

As Samples are generated, Sample details are included. See Sample Points for information about the Sample information displayed.
Viewing Different Layers |
Each map provider can provide multiple layers. For example, Bing Maps supports multiple Imagery Sets which can be configured as different layers (such as Streets, Satellite).
The different Map Layers that have been enabled can be shown and switched using the control on the right.
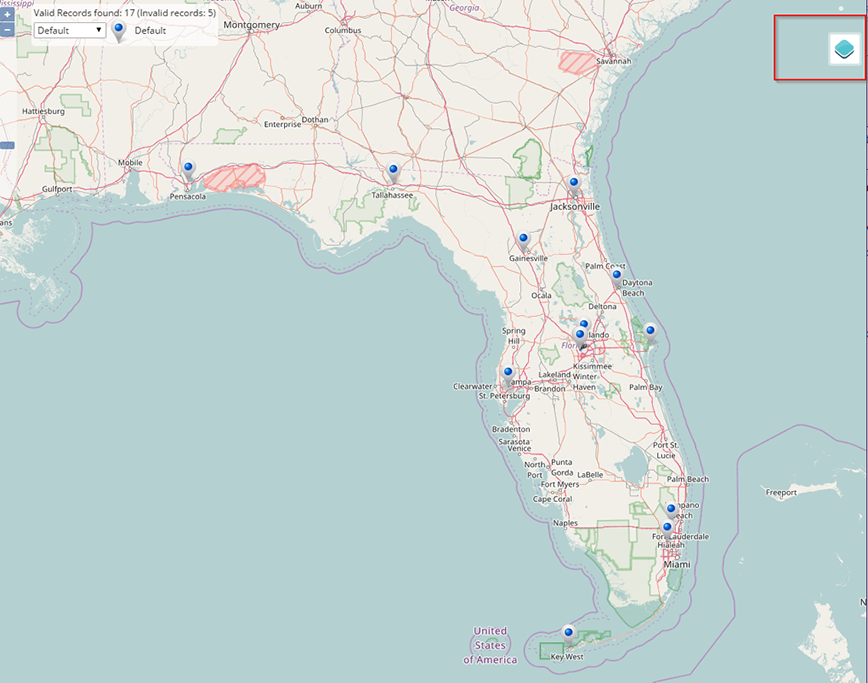
Clicking the control opens a menu where you can choose from the available (configured) layers.
Map Configuration |
| |
Use the Map Policy to configure the maps you use, and the way in which Sample Points are represented on the Map. Using the Policy, you can configure:
| • | Projections |
| • | Map Sources |
| • | Pin style |
Projections |
Projections are the Coordinate Reference Systems (such as EPSG-3857) used when displaying a map. These Projection values are defined in the "Projection" Reference Type, then available when choosing a Projection in the Sample Point.
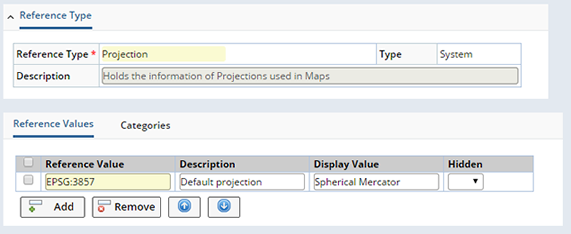
The Projection itself must be defined in the in the Map Policy (as the system does not know how to convert between different projections unless it has been properly configured in the Map Policy).
There are two types of Projections:
| Field | Description |
| Alias | The Projection is configured as an Alias of another Projection.
For example, EPSG:3067 is also known as ETRS-TM35FIN (Alias). Add "ETRS-TM35FIN" as a Reference Type, then also add it as a Projection (ETRS-TM35FIN), then define it as an "Alias Of" EPSG:3067. |
| Conversion | Different projections provide different accuracy in different regions. Projections defined with conversion strings lets LabVantage know how to convert between the different Projections.
For example, to support the coordinate system EPSG:3067 first add "EPSG:3067" as a Reference Type, then also add it as a Projection (EPSG:3067), then define a Conversion string. The Conversion string needs to be defined in proj4js format. |
Map Sources |
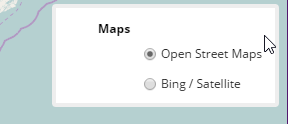
Configure the source of the maps displayed in the Map Interface. "Open Street Maps" is provided OOB. "Bing Maps" are configured, but disabled (Bing Maps are not free and require an API key from Microsoft). Optionally define maps using a Web Map Tile Service (WMTS) or Web Map Service (WMS).
In the Map Policy define properties that configure the maps for each source.
Pin styles |
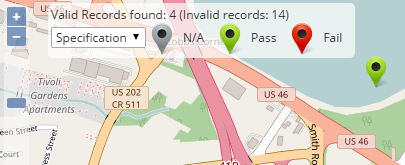
Pin styles can represent the various states of a Sample Point and its Samples (or any SDC using Coordinates). In the default configuration, LabVantage determines which pin style to use based on the latest Sample taken from that Sample Point. Configure Pin styles to represent additional (Extra) columns and defined values (such as Specification, pass or fail), or show a different pin based on the Excursion status of the Sample Point.
Defined Pin styles are available in the drop down list when viewing the map.
| Pin style | Example |
| Default |
|
Specification |
|