Introduction |
|
|
|
View and Manage Scheduled Events |
Introduction |
|
|
You have two options for Viewing and Managing Scheduled Events.
| • | Calendar View The Calendar presents all Events within a Calendar format. Events can be easily managed and moved around the Calendar. |
| • | List View View Events in a list format. |
Access the Calendar or List Views from a Plan Item, or from the Sample Point list page using the "View Events" button.
Calendar View |
|
|
Choose Calender in the "Show" field to open the Calendar.
Navigting the Calendar |
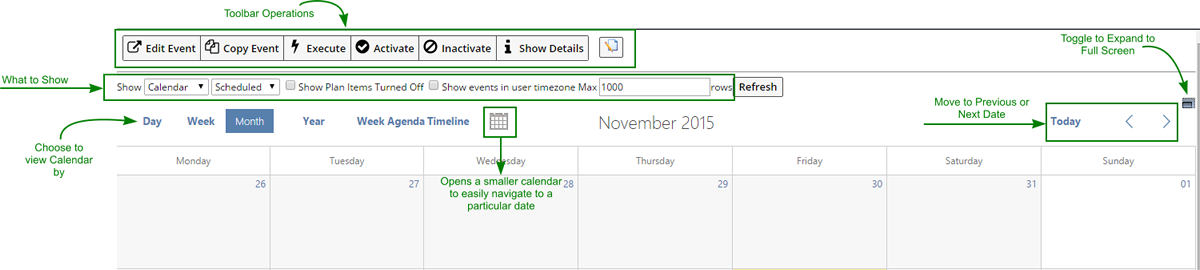
You have the following options for viewing Events in the Calendar.
| Control | Purpose |
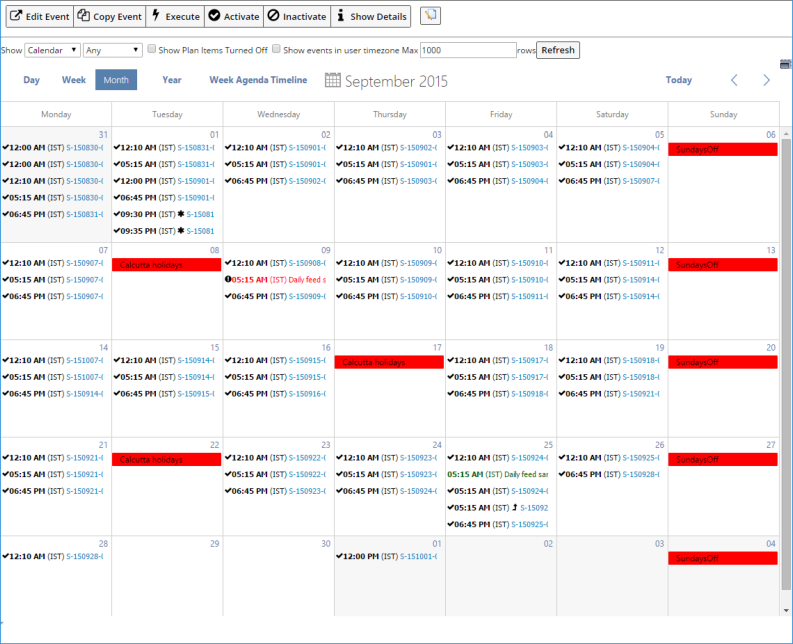
| Show | Choose how you want to view the Calendar, such as weekly, daily. See Calendar Views for an example of each option. |
| Show Plan Items Turned Off | Include Plans that are turned "Off". |
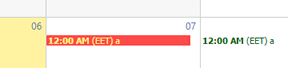
| Show Events in the User's Time Zone | Show Events in the User's Time Zone.
Times in the Calendar are shown in the Plan Time zone when the time zone differs from the users Time Zone. In the following example the time zone is (IST).
Checking the "Show events in user timezone" option shows the Events in the user's Time Zone. The Time changes to EST. |
| Max Number of Rows | Define a maximum number of rows to display. |
| Refresh Button | Refresh the information displayed on the Calendar. |
The Calendar View provides visual cues to help you identify the status of Events and provides convenient tools for viewing and managing Events.
Clicking the Date drills down into the view allowing you to see Events for a specific day within the month view.
Clicking an Event selects the Event, when selected the Event is highlighted in red. Select the Event and perform any of the operations on the Toolbar. See Operations from the Calendar or List View for more information.
Events displayed in the Calendar can have the following Stauses. Each Status is represented by a different color.
| Status | Description |
| Planned | Planned Events display in black, they are planned but not yet scheduled. |
| Scheduled | Scheduled Events display in green. The Event has been Scheduled. |
| Flagged | If, when defining the Plan Exclude Mode option you chose to "Flag The Scheduled Execution to be Moved", those Events are Flagged in the Calendar and highlighted as follows: |
| Inactive | Inactive Events display as light gray. The Event has been Inactivated. See Inactivate or Activate an Event for more information. |
Calendar Views |
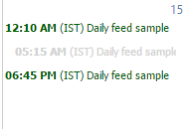
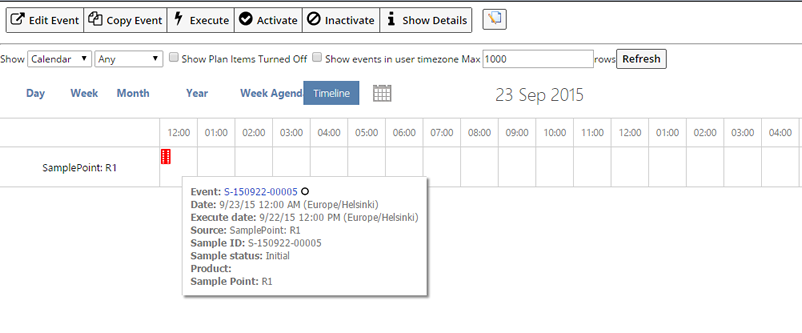
There are multiple ways to view the Calendar. Within each view you can hover over an Event to display details as illustrated below. Clicking the Sample hyperlink opens a window where you can view Sample details.
| View | Description |
| Day |
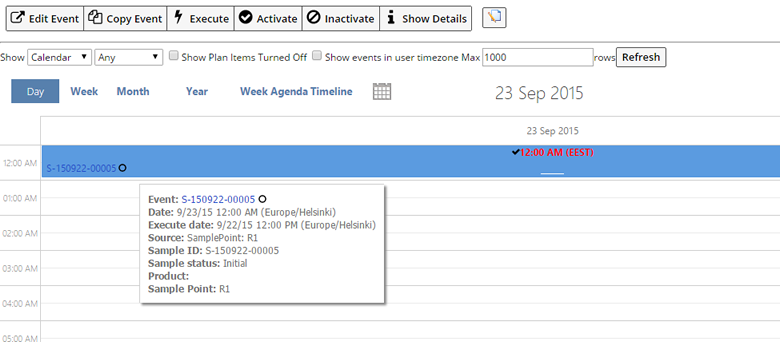
|
| Week | 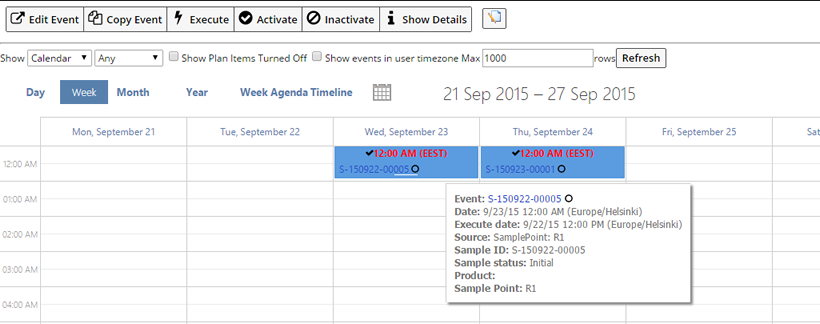 |
| Month | 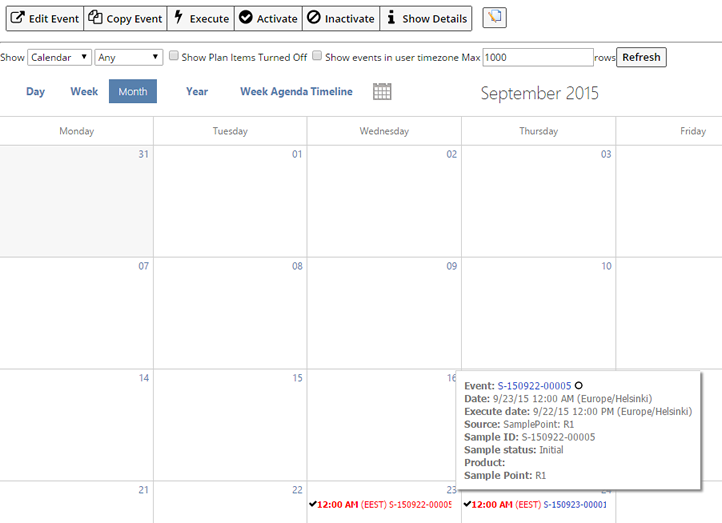 |
| Year | 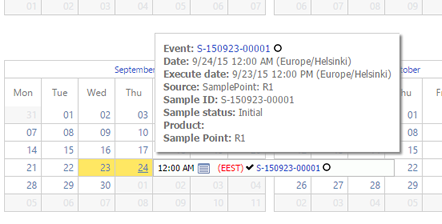 |
| Week Agenda |
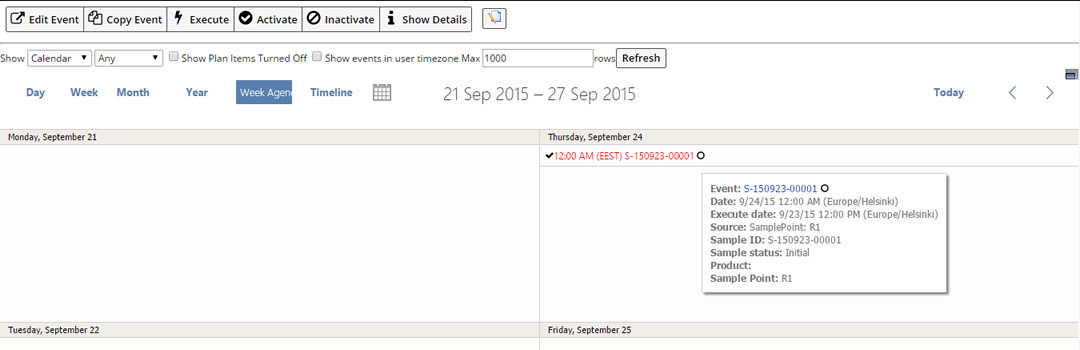
|
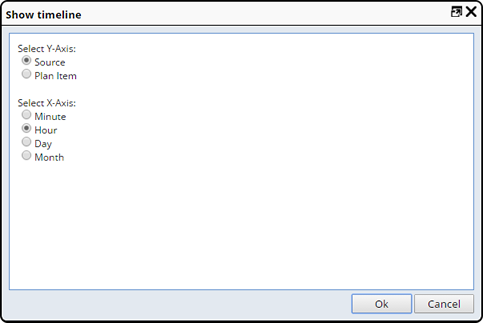
| Timeline |
Optionally choose to show the Timeline based on either the Source or Plan Item. Clicking "Timeline" opens the Show Timeline dialog.
In the above example we chose Sample Point for the Y-Axis and Hour for the X-Axis. |
Move Events |
You can easily move scheduled Events to a different date by dragging and dropping the Event to a new date in the Calendar. Move Scheduled, Planned, Inactive and Flagged Events.
You can also move an Event by selecting the Event and changing the date using the Edit Event button.
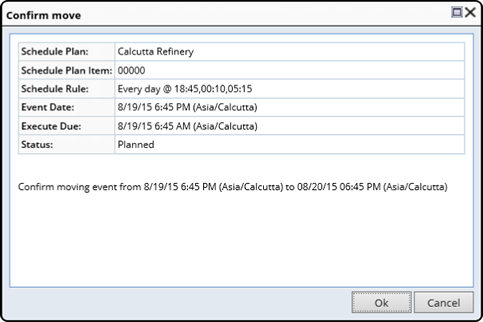
Click the Event you want to move and drag it to the new date. Details of the move are displayed in the Confirm Move dialog. Click "Ok" to proceed with the move.
List View |
|
|
The List View provides most the same functionality as the Calendar View but a in a List format. After clicking the View Events button (on the Schedule Plan or Sample Point list page) the View Event List page displays.
Note: Change the view between "Calendar" and "Event List" using the Show dropdown.
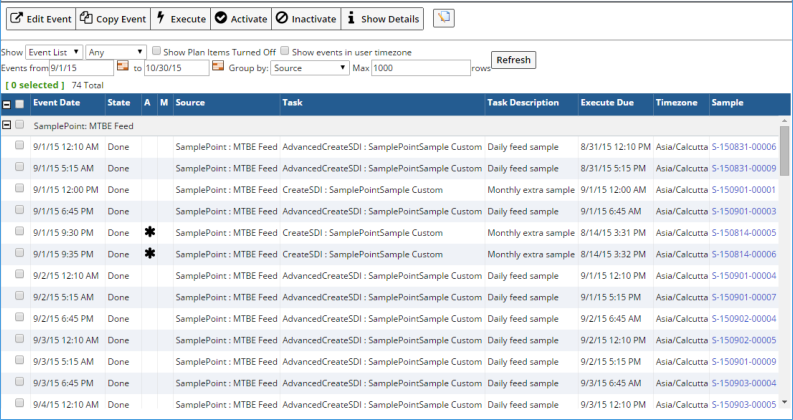
You have several options for viewing Events in the list.
| Control | Purpose | ||||||||||||
| Show | Switch between the Event List and the Calendar. | ||||||||||||
| Show Plan Items Turned Off | Include Plans that are turned "Off". | ||||||||||||
| Show Events in the User's Time Zone | Show Events in the User's Time Zone. | ||||||||||||
| Events From To | Filters the display to show only Events relevant to the selected time period. Click the calendar icon and choose the beginning and end of the period. | ||||||||||||
| Group by | Groups Events into expandable/collapsible lists according to the selected
column header.
|
||||||||||||
| Maximum Rows | Maximum number of Events displayed. Enter the number of rows, then click the OK button next to the entry field. | ||||||||||||
| Collapse All Expand All |
Collapses or expands all of the groups. Click + or - to expand or collapse individual lists. |
Operations from the Calendar or List View |
|
|
From either the Calendar or List view you can perform any of the following operations.
Edit Event |
Make chages to the Event by clicking the Event and choosing "Edit Event".
The Edit Event dialog displays.
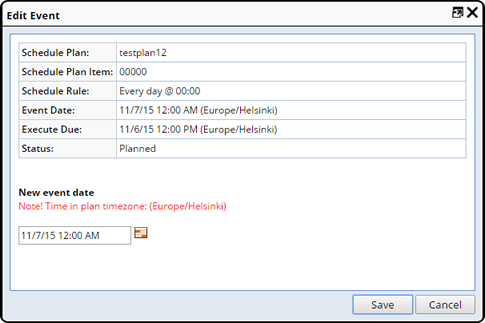
Enter the new Event date.
Moved events will be shown with the Move icon ![]() .
.
Copy Events |
Copying an Event creates an adhoc event in the database. Adhoc Events are executed according to the Schedule Ahead date, not immediately.
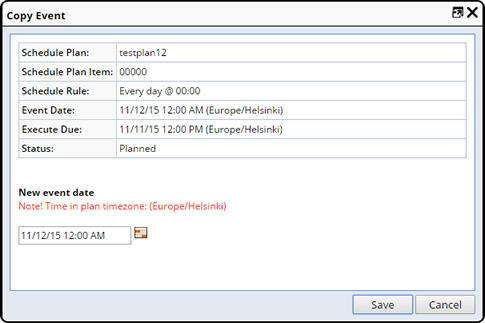
Adhoc Events will be shown with the Adhoc icon  .
.
Execute Adhoc Events |
You have three options for executing Events. Using the "Execute" button choose to:
| Option | Description |
| Execute Now | Immediately executes the event with the original event date, the event will not be executed when the original execute date arrives. |
| Additional execution | Creates and executes the Event immediately, a new adhoc event is added with the original event date. |
| Additional execution with given event date | Creates and executes immediately a new adhoc event with a given event date. |
Adhoc executions are shown with the Adhoc icon .
Inactivate or Activate an Event |
Use the "Inactivate button" to set the Event in a state where it will not be executed. An Inactivated or Flagged event can be Activated again using the "Activate button". Inactive events are shown in light gray on the Calendar View.