Content |
|||||||||||||||||||||||||||
|
Overview |
|
|
The Configuration Transfer Tool (CTT) is a set of integrated tools distributed throughout LabVantage:
|
|
To export SDCs and SDIs...
Use the "Export" sidebar operation on the SDC List page and SDI List pages, respectively. For simple transfers with few RI implications (such as when transferring Actions), use this with the "Adhoc" option. For simple transfers with more complex RI considerations, (such as when transferring Protocols), use this with the "Export Script" option. Both of these options are described in Exporting Features, Exporting SDCs, and Exporting SDIs. To import data, use the Import page on the target as described in Importing Items. |
|
|
|
To export anything in the database (SDCs, SDIs, tables, table columns),
or export a large number of items...
Create a Transfer Package using System Admin → System Tools → Transfer Package, as described in Working with Transfer Packages. This excels at transferring collections of data. To import data, use the Import page on the target as described in Importing Items. |
|
|
|
To export Web Page Designer items (Pages, Page Types, and Elements)... Use the "Export" button on the relevant List page in the Web Page Designer, as described in Exporting Items from the Web Page Designer. |
|
|
|
To deal with projects that require data synchronization and other procedural
activities...
Develop an ANT script to run from the source system and another for the target system. Execute the scripts from System Admin → System Tools → Run Ant. If you are familiar with ANT, this is described in CTT ANT Tasks and the CTT ANT Task Reference. |
|
|
|
To import any exported item from the LabVantage interface...
Use System Admin → System Tools → Import, as described in Importing Items. |
|
|
|
To compare SDCs between two databases...
Use the Compare Configurations Tool in System Admin → System Tools → Compare Configurations. |
|
|
|
To modify system-wide options...
Use the System Configuration Transfer Options in System Admin → System → Configuration. |
|
|
|
To view events logged during the transfer...
Use System Admin → System Tools → Transfer Log. |
|
|
|
Exporting Features |
|
|
Exporting is more complex than importing. When setting up an export, you specify what you want to export, how to export it, and how it will be imported. After you complete the export, you just do the import... and the export file does what you told it to do.
Here's an overview of export features, listed in the order of how complex each feature is to use (complexity is proportional to power):
|
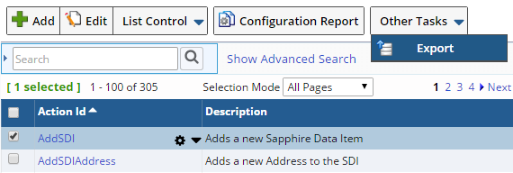
Export The "Export" operation in List pages is used to export selected SDCs and SDIs. It works with an RSet containing a list of selected items. Note that exporting an SDC in a given component development mode excludes columns from different components. When you export an SDC, there are no options. When you export an SDI, there are two Export options... "Adhoc" and "Export Script": |
|
|
Adhoc
"Adhoc" lets you define a single set of options for exporting SDIs for an SDC (a la carte). This generates an XML file called an "Export Package", which contains data produced by the export, as well as directives concerning how the data will be imported into the target database. This is what you will be importing, i.e., the deliverable. Example:
Adhoc exports are good for quick, simple transfers that do not require a great deal of control over the export process. However, without adequate data model knowledge, Adhoc exports may lead to RI issues on import. For more complex exports requirring high degrees of control, Export Scripts are more suitable (below). |
||||||||||||||||||||||||||||||||||||||||||||||||||||
|
|
Export Script
"Export Script" lets you define multiple sets of options for exporting SDIs. This generates an XML file called an "Export Script" (also a deliverable), which contains the definition of how to export SDIs for an SDC. Unlike "Adhoc", this is reusable. For example, you can run an Export Script from a button, or in a Transfer Package (next item). An "Export Script" defines how a given SDI (or set of SDIs) for an SDC is exported. The set of SDIs is defined by the [export.rsetid] property. An Export Script contains a set of "Export Steps" that define the data to be exported. This data may be tables for the current SDC and/or other SDC/SDI data. For a given SDC, you define an Export Script in the SDC Maintenance page for the relevant SDC. Example:
|


|
Transfer Package A "Transfer Package" can export anything in the database, and define how to do each export. For SDIs, a Transfer Package can also run Export Scripts. Use this to transfer a large number of items. A "Transfer Package" defines an export for a set of data, and comprises a set of Export Steps that define the data to be exported. This data may be SDC/SDI data and/or specific tables. The data that is exported is defined in the "Transfer Steps" in the form of queries, categories, keyids and keyfiles. The Transfer Package also defines the location of the export file(s). A Transfer Package contains one or more "Transfer Steps" that define the export of an SDI and/or table. Example:
|
|
Ant Script Ultimately flexible, this lets you build and run an Ant script to export anything in the database. As an extension of the Transfer API, a set of Ant Tasks is provided for use when writing the script. |
Exporting SDCs |
|
|
Export SDC Wizard Overview |
Click the Export operation on the SDC List. The Export Wizard guides you through the process.

|
Wizard Flow:
| 1. | Review Selections | |
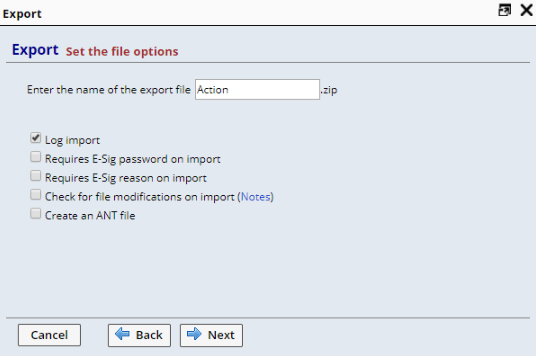
| 2. | Set files options. | |
| 3. | Run export. |
Export SDC Wizard Detail |
|
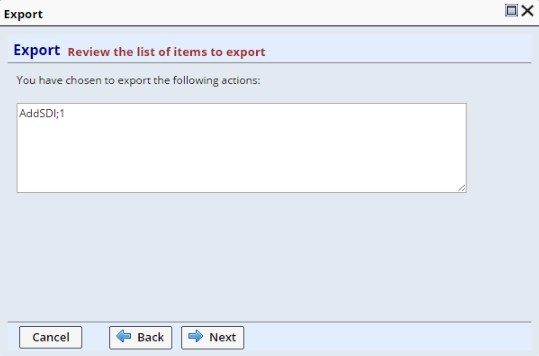
Review Selections
Review Review your changes before proceeding. |

|
|
|
Export Complete indicates the export was successful. The file is downloaded through the browser to its specified download location. |

Exporting SDIs |
|
|
Export SDI Wizard Overview |
Click the Export operation on the SDI List. The Export Wizard guides you through the process.
|
Wizard Flow:
| 1. | Review Selections | |
| 2. | Set export options. | |
| 3. | Set file options. | |
| 4. | Run export. |
Export SDI Wizard Detail |
|
Review Selections
Review Review your changes before proceeding. |
|
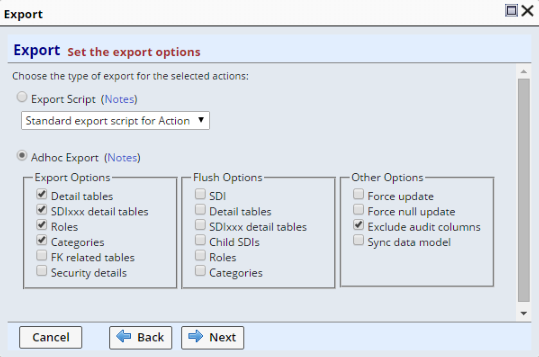
Export Script "Standard Export Scripts" for each SDC are defined in the relevant SDC Maintenance page's "Export Scripts" detail as shown in SDCs → Supporting Functions → Exports, and you can determine the behavior of the script by examining it as shown. In general, most OOB scripts provide a basic level of export capability, although more comprehensive export is available for some SDCs. See Enhanced SDI Export Scripts for more information. Adhoc Export
Data are always added to the Export Package from the "primary" table. Additionally, these options are available:
|
|
Set File Options These are the same options as SDC exports. |
|
Run Export This is the same as SDC exports. |
Enhanced SDI Export Scripts |
An ongoing effort is underway to provide more comprehensive export of SDIs, especially when they can be associated with many other SDIs. The Export Scripts for the SDCs listed below currently provide enhanced export capability:
| SDC | Associated SDIs that are also exported: |
| Workitem | Parameter Lists (WorkItemItem), Specifications (WorkItemItem), Workflows (SDIWorkflowRule), Forms (SDIFormRule), referenced Workitem Groups (WorkItemItem), and Child Test Methods. |
| ProtocolSDC | Product and Plan. |
Working with Transfer Packages |
|
|
Transfer Package Overview |
A "Transfer Package" defines an export for a set of data, and comprises a set of Export Steps that define the data to be exported. This data may be SDC/SDI data and/or specific tables. The data that is exported is defined in the "Transfer Steps" in the form of queries, categories, keyids and keyfiles. The Transfer Package also defines the location of the export file(s).
You can use "Transfer Package Properties" to generalize your Transfer Package. Embed them in your Transfer Package by enclosing them in square brackets, e.g., [export.dir]. They will be evaluated when the transfer package is executed.
You can use these properties like variables and modify them when a Transfer Package is run. These properties cannot include or reference other properties.
A Transfer Package contains one or more "Transfer Steps" that define the export of an SDI and/or table. SDI and table exports assume a default filename unless explicitly defined. Transfer Steps define export and import order... this is significant when RI considerations are involved.
Transfer Package Procedures |
|
Create Transfer Package
Create a Transfer Package using System Admin → System Tools → Transfer Package → Add. |
|
Specify Transfer Steps
|
| After saving the Transfer Package, the detail lets you add the "Transfer
Steps":
Add Property Specify a Property Id and Value.
Add SDI This defines SDI exports. Specify the SDC Id, Filename, and one of the following "Export criteria":
Add Table This defines table exports. Specify the Table Id and SQL statement:
|
|
Run the Transfer Package
The "Run Transfer" button runs the export defined by the Transfer Package. The resulting wizard lets you review and update property values.
The file options are the same options as SDC exports. |
CTT ANT Tasks |
|
|
This option provides the most power for defining exports, and is ideal for projects where a structured, repeatable process is required.
CTT ANT Tasks extend the standard ANT library of tasks. These scripts can be run from within LabVantage. Export wizards generate ANT scripts that can be combined into larger scripts. An added benefit is that these can be good learning aids.
Develop one ANT script to run from the source system, and another for the target system.
LabVantage provides a wizard-driven utility to run ANT, accessible through
System Admin → System Tools →
Run Ant.
Reference |
For a description of CTT ANT Tasks, see the CTT ANT Task Reference.
Exporting Items from the Web Page Designer |
|
|
Overview of Node Hierarchy Export |
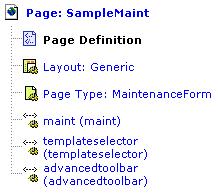
As an example, exporting a Page produces the following results:
When exporting items from the Web Page Designer, the export files retain node hierarchies. For example, exporting a Page produces the following results:| Exported Item | Exported Files | |
 |
|

| Collapsed Structure of SampleMaintExport.xml | ||
<exportpackage> <sdi sdcid="WebPage"> <table tableid="webpage"> <table tableid="webpageproperty"> <table tableid="webpagepropertytree"> </sdi> <propertytree propertytreeid="Generic" exists="merge" notexists="add"> <propertytree propertytreeid="MaintenanceForm" exists="merge" notexists="add"> <propertytree propertytreeid="advancedtoolbar" exists="merge" notexists="add"> <propertytree propertytreeid="maint" exists="merge" notexists="add"> <propertytree propertytreeid="templateselector" exists="merge" notexists="add"> </exportpackage>
<exportpackage> <sdi sdcid="WebPage"> <table tableid="webpage"> <table tableid="webpageproperty"> <table tableid="webpagepropertytree"> </sdi> </exportpackage> |
| Expanded Structure of SampleMaintExport.xml with
All Nodes in Page Hierarchy Exported The numbers at the left segregate sections of the code. | |
| <exportpackage> | |
| 1. | COMMENT: SDC definition <sdi sdcid="WebPage"> |
| 2. | COMMENT: WebPage table definition <table tableid="webpage"> <tabledef tableid="webpage"> COMMENT: One column definition exists for each column in the table. Column "webpageid" shown for example. <coldef columnid="webpageid" datatype="C" pkflag="Y" nnflag="Y" columnlength="20" columntype="S" /> </tabledef> <row forceupdate="Y"> COMMENT: One column value exists for each column in the table. Column "webpageid" with value "Sample Maint" shown for example. <col name="webpageid" forceupdate="Y">SampleMaint</col> </row> </table> |
| 3. | COMMENT: WebPageProperty table definition <table tableid="webpageproperty"> <tabledef tableid="webpageproperty"> <coldef columnid="webpageid" datatype="C"
pkflag="Y" nnflag="Y" columnlength="20" columntype="S" /> </tabledef> </table> |
| 4. | COMMENT: WebPagePropertyTree table definition <table tableid="webpagepropertytree"> <tabledef tableid="webpagepropertytree"> <coldef columnid="webpageid" datatype="C"
pkflag="Y" nnflag="Y" columnlength="20" columntype="S" /> </tabledef> <row> COMMENT: One row exists for each propertytreeid (Generic, MaintenanceForm, advancedtoolbar, maint, and templateselector). "Maintenance Form " shown as an example. <col name="webpageid">SampleMaint</col>
</row> </table> |
| 5. | COMMENT: If you export all nodes in the Page hierarchy, there will be one definition for each propertytree. "MaintenanceForm" shown as an example. <propertytree propertytreeid="MaintenanceForm" exists="merge" notexists="add"> <nodelist> COMMENT: One definition for each node. Edit Page shown as an example. <node nodeid="EditPage" collapseancestor="false" includeancestor="true" includedescendsnts="false" extendsnodeid="EnterpriseLIMS" locked="false" exists="merge" notexists="add"> <propertylist exists="replace" notexists="add"> COMMENT: One definition for each property in propertylist. "Includes" shown as an example. <property id="includes" type="collection"> <collection /> </property> </propertylist> </node> </nodelist> </propertytree> |
| </exportpackage> |
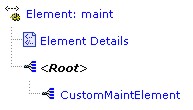
As another example, a full export on an Element (all nodes) outputs a defnitiontree file (containing the definition of each Property List), and a valuetree file (containing the definitions for each node, similar to section 5 above). The file containing all nodes (maintexportfull.xml in the example below) contains the definition and value for each row in the PropertyTree table.
| Exported Item | Exported Files | |
 |
|
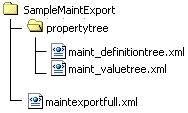
As you would expect, exporting only the "CustomMaintElement" node would result in a single XML file containing the values for that node, again similar to section 5 above
In addition to these examples, each of the many export options (described below) generates files that supply the level of detail required to import the file.
Exporting Pages |
Click the Export button on the Page List.
 |
The Export Wizard guides you through the process.
Wizard Flow:
| 1. | Review Selections. | |
| 2. | Set export options. | |
| 3. | Set file options. | |
| 4. | Run export. |
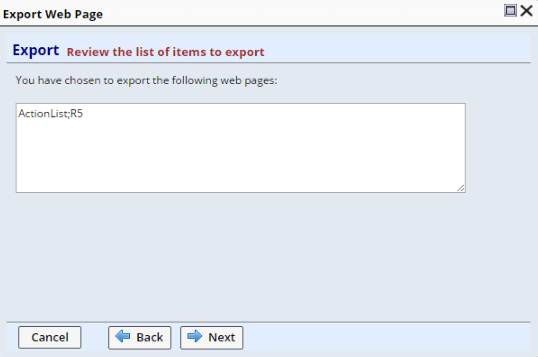
| Review Selections
Review Review your changes before proceeding. |
|
|
|
| Set File Options These are the same options as SDC exports. |
| Run Export This is the same as SDC exports. |
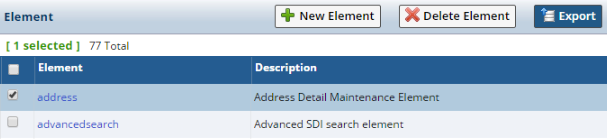
Exporting Page Types, Elements, Gizmo Types, Step Definitions, and Layouts (Collectively known as Property Trees) |
Click the Export button on the relevant List page.
 |
The Export Wizard guides you through the process.
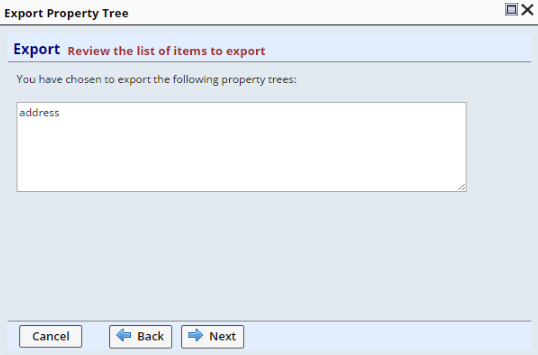
| Review Selections
Review Review your changes before proceeding. |
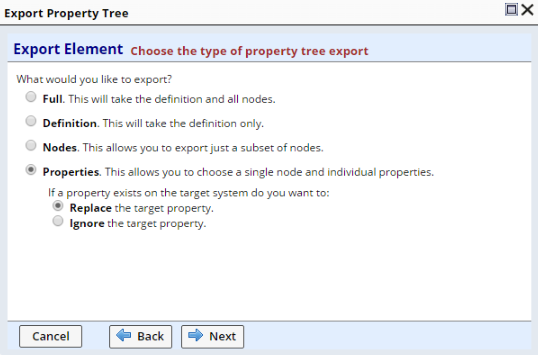
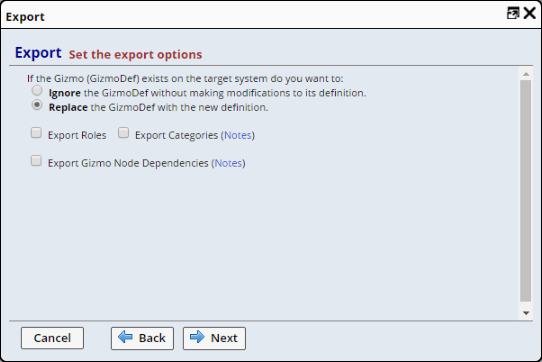
| Choose Export Type:
|

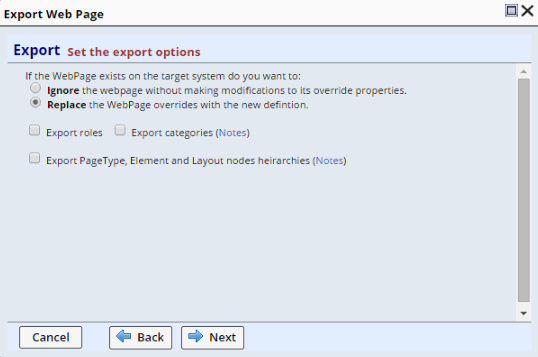
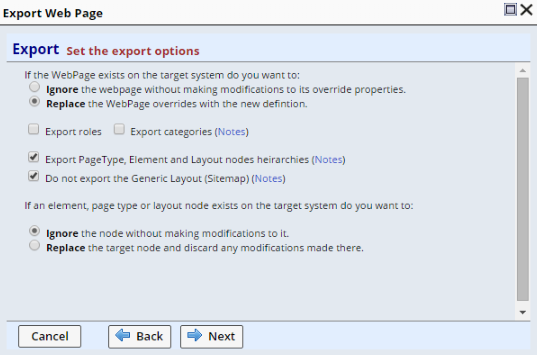
| Full This will export the PropertyTree including all nodes and the definition. If the Property Tree already exists on the target system, you have the following options:
Review Review your changes before proceeding. Set File Options These are the same options as SDC exports. Run Export This is the same as SDC exports. |
| Definition This will export only the property definition of the Property Tree. This is useful when a new property has been added to the definition that needs to be transferred to a target system, but where pproperty values themselves need not be transferred. Review Review your changes before proceeding. Set File Options These are the same options as SDC exports. Run Export This is the same as SDC exports. | |||||||||||
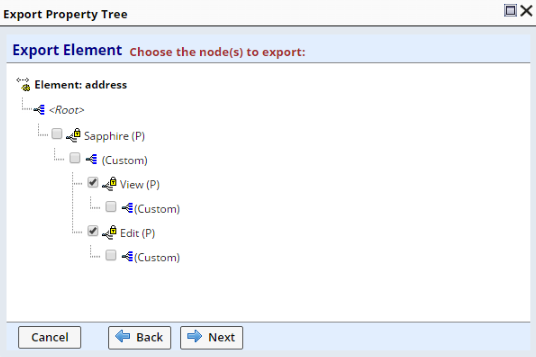
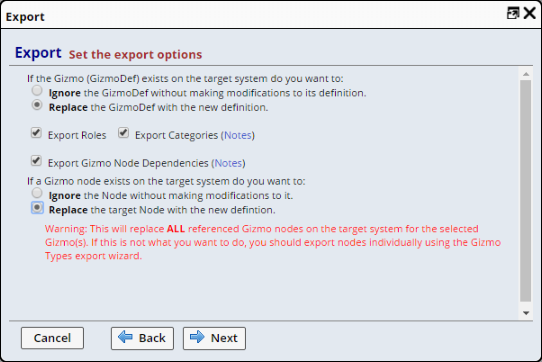
| Nodes:
By default, only (Custom) nodes and nodes that you have created yourself will be replaced on the target system. All Product nodes on the target system will be left intact. The alternative strategy is to apply either of the following two options to ALL nodes that you select:
| |||||||||||
Choose the nodes to export:
| ||||||||||||
Set File Options These are the same options as SDC exports. | ||||||||||||
Run Export This is the same as SDC exports. |

| For Property Exports:
| |||||||||||
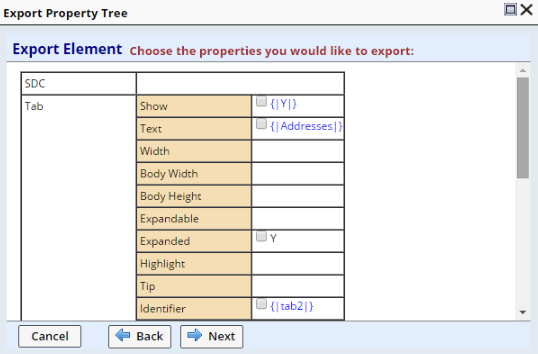
Choose the Properties to export:
| ||||||||||||
Set File Options These are the same options as SDC exports. | ||||||||||||
Run Export This is the same as SDC exports. |
Exporting Gizmos |
Click the Export button on the Gizmo List page.
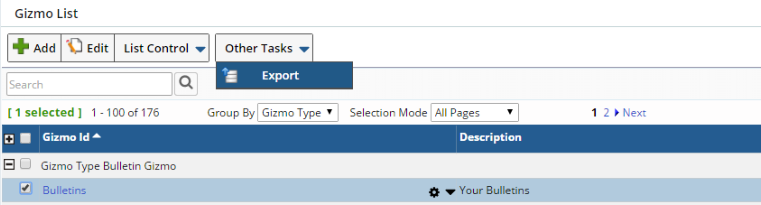 |
The Export Wizard guides you through the process.
| Review Selections
Review Review your changes before proceeding. |

|
|
|
| Set File Options These are the same options as SDC exports. |
| Run Export This is the same as SDC exports. |
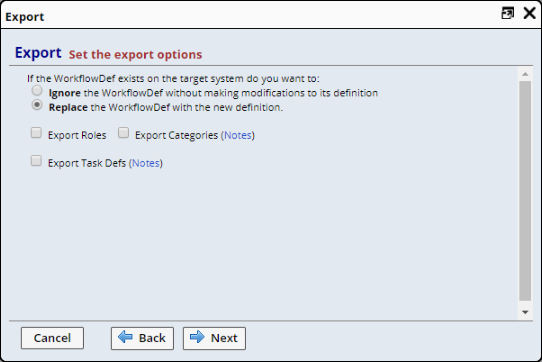
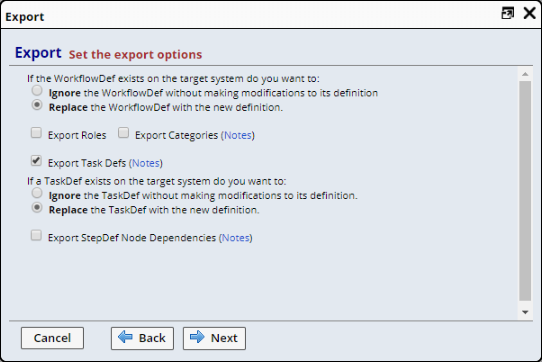
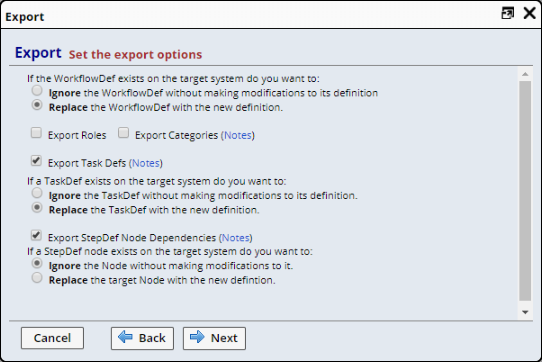
Exporting Workflow Definitions |
Click the Export button on the Workflow Definitions List page.
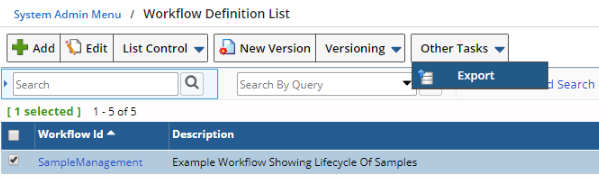 |
The Export Wizard guides you through the process.
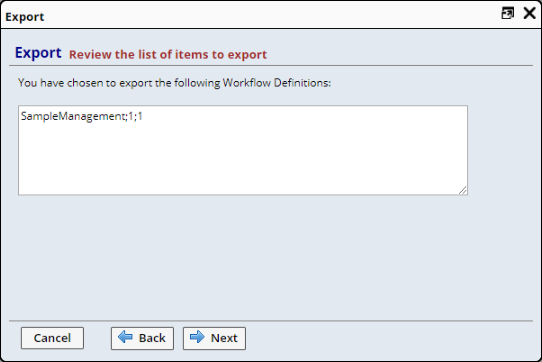
| Review Selections
Review Review your changes before proceeding. |
|
|
|
| Set File Options These are the same options as SDC exports. |
| Run Export This is the same as SDC exports. |
Importing Items |
| |
Import Wizard Overview |
Regardless of what you exported, all imports are done through System Admin → System Tools → Import.
Wizard Flow:
| 1. | Choose file. | |
| 2. | Parse file. | |
| 3. | Run import. |
Import Wizard Detail |
| Choose File
|
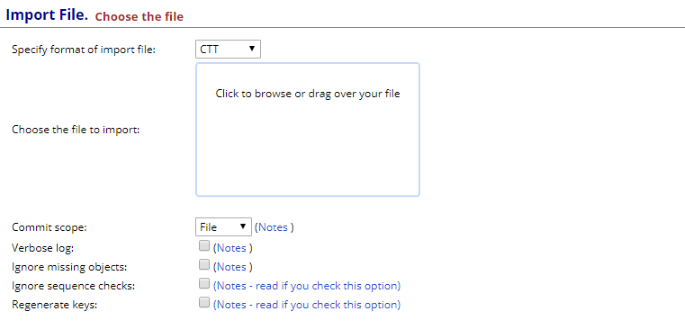
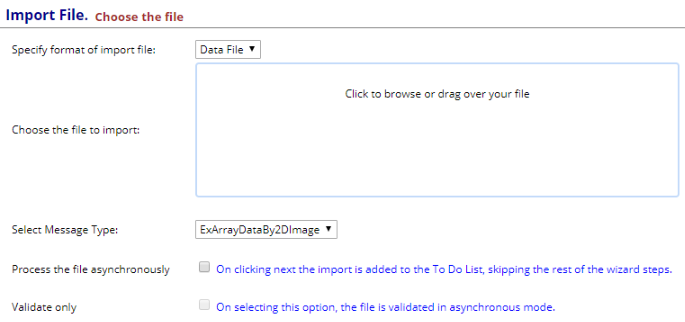
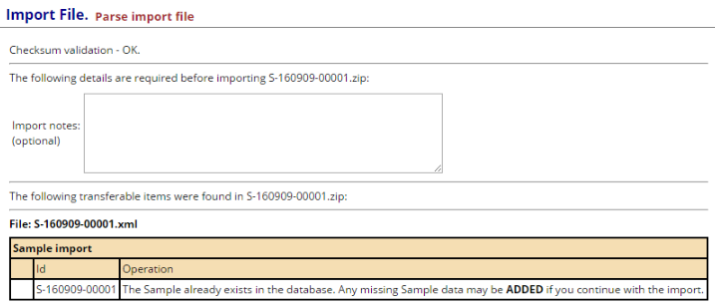
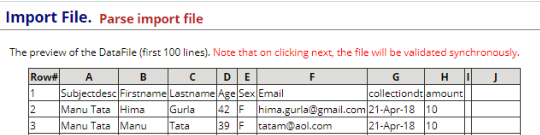
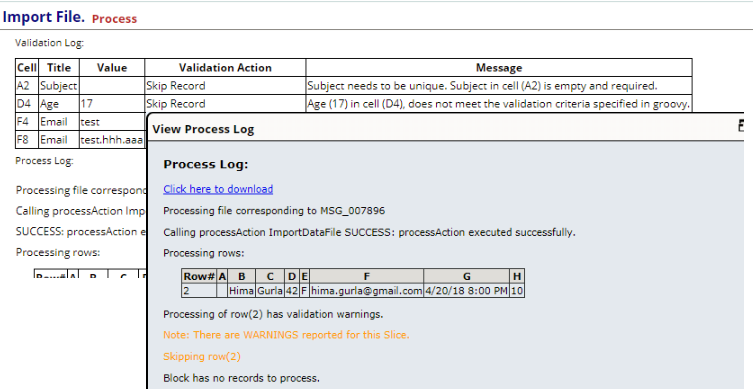
| Parse File
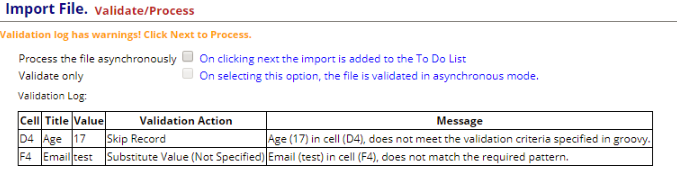
For CTT Imports (left): Enter notes for the log if desired. An import analysis is shown. For Data File Imports (right): The preview page is displayed if "Process the file asynchronously" is not checked. The wizard starts a validation check on the file synchronously. The validation check is set to run for 30 seconds. If the file to too large, the validation check returns a partial validation log. A list of validation errors/warnings is displayed in the next page. In case only warnings appear, the "Next" button is enabled and you can proceed with processing by clicking "Next". You can optionally process asynchronously at this point.
If validation errors exist, the wizard prohibits processing. Only a "Finish" button is displayed. |
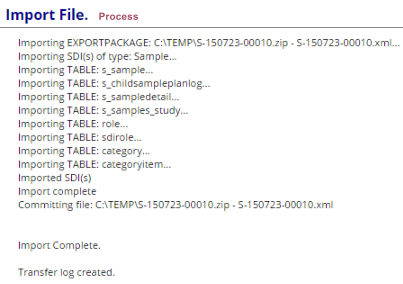
| Run Import
CTT Import is above left. Data File Import is above right. For Data Files, the Process Log is displayed when processing synchronously. |
|