Content |
||||||||||||||
|
Overview |
|
|
The "File Viewer" Control uploads files to LABVANTAGE_HOME\eln\attachments and inserts the files into an ELN/LES Worksheet as Attachments. File content can then be viewed and edited in the Worksheet. Allowable file types are:
| • | Text files in .txt, .csv, and .xml formats. |
| • | Microsoft Word files in .doc and .docx formats. |
| • | Image files in .png, .jpg, and .gif formats. |
| • | Microsoft Excel files in .xls and.xlsx formats. |
| • | Microsoft PowerPoint files in .ppt and .pptx formats. |
| • | Adobe PDF files in .pdf format. |
Description |
|
|
Selecting Files to Upload |
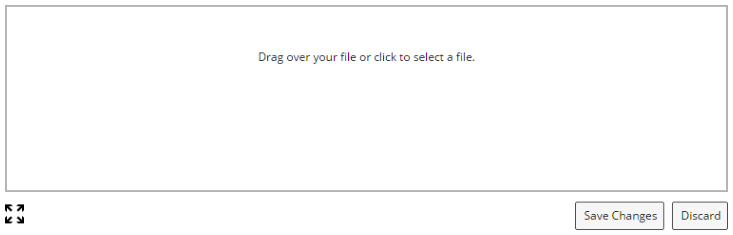
After adding the File Viewer Control to the Worksheet, the File Viewer opens in "Upload" mode. This renders a selection area that lets you drag over your file or click the the text as instructed and choose the file from a file browse dialog. After selecting the file, the file uploads to LABVANTAGE_HOME\eln\attachments. The file control then refreshes to show the attachment in "View" mode, which is view-only.
 |
Text and Word Files |
Text and Word files in "View" mode can be modified by clicking "Edit".
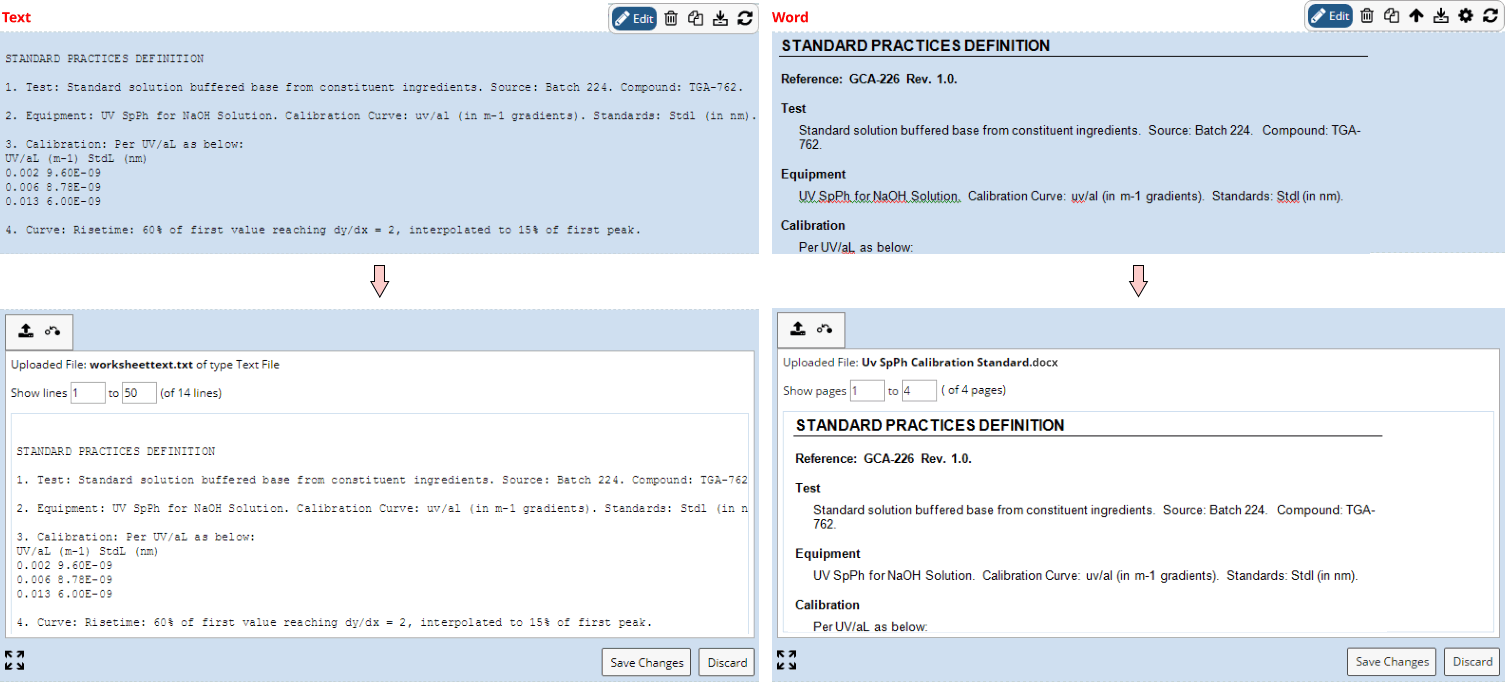 |
The line/page options allow control over the number of lines shown for text files (below left) and number of pages shown for Word files (below right). The defaults are configurable using the Configuration Properties.
| |
Changing these fields prompts you to regenerate the preview as shown below. You can click the link or "Save Changes" to regenerate.
| |
The icons apply to all file types:
|
|
The "Upload" icon is used to change or re-upload files. This clears the rendered file from the Control and once again displays the selection area that lets you select and upload another file. |
|
|
The "Revert" icon reverses all changes made in the view mode preview and reinserts the file into the Control to generate a new view mode preview. This may be important if the referenced Attachment has changed. |
| NOTE: | The conversion of Word to HTML is performed by the Aspose.Words File Format API, which controls the appearance of the rendered HTML. |
Image Files |
Image files in "View" mode show a compressed view of the image. The default resolution is configurable using the Configuration Properties. The image can be modified by clicking "Edit".
The top banner shows a description of the uploaded file, the resolution of the image to show in view mode, and a preview of the image. Using the resolution input fields, you can modify the width and height of the image to show in view mode. The aspect ratio of the image is preserved (changing one dimension alters the other and refreshes the view). The "Use Raw Image" checkbox forces the Control to show the native Attachment in view mode with no markup, editing, or resizing.
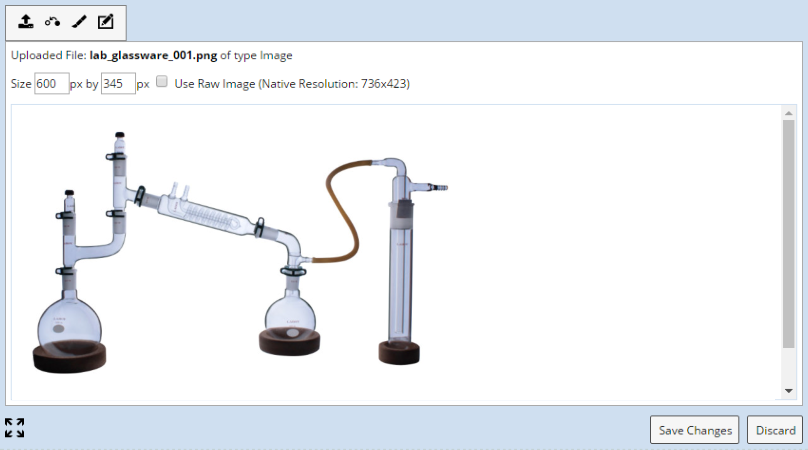 |
The size options allow control over the size of the image.
| |
Changing these fields prompts you to regenerate the preview as shown below. You can click the link or "Save Changes" to regenerate.
| |
These icons are provided on the toolbar:
|
|
The "Upload" icon is used to change or re-upload files. This clears the rendered file from the Control and once again displays the selection area that lets you select and upload another file. |
|
|
The "Revert" icon reverses all changes made in the view mode preview and reinserts the file into the Control to generate a new view mode preview. |
|
|
The "Markup" icon lets you draw on the image. This uses the same tool as the Rich Text Control image markup. After adding your markups, Add any markup such as text, drawing and shapes and click the Save Changes to store the changes. Please note the original attachment is unchanged and the markup is stored in the control only. |
|
|
The "Crop and Edit" icon lets you crop, rotate,
and flip the image. This opens a cropping area with a new toolbar.
Clicking the first "Crop" button crops the selected area. The second "Rotate" button rotates the image by 90 degrees clockwise. The last two buttons flip horizontally and vertically. When finished editing or cropping, click "Save Changes". Be advised that the original Attachment is unchanged. The edited changes are stored in the Control only. |
| NOTE: | The processing of WMF, EMF, TIFF and TIF files is done by the Aspose.Imaging
Library.
When processing TIFF files, only the first frame is taken when multiple frames exist in the image. Both image types (WMF, EMF and TIFF and TIF) do not show the "Use Raw Image" option on the edit file control as the image cannot be displayed natively in the browser. |
Excel Files |
Excel files in "View" mode can be modified by clicking "Edit".
 |
The options allow control over the number of sheets shown and whether or not gridlines are shown. The defaults are configurable using the Configuration Properties.
| |
Changing these fields prompts you to regenerate the preview as shown below. You can click the link or "Save Changes" to regenerate.
| |
The icons apply to all file types:
|
|
The "Upload" icon is used to change or re-upload files. This clears the rendered file from the Control and once again displays the selection area that lets you select and upload another file. |
|
|
The "Revert" icon reverses all changes made in the view mode preview and reinserts the file into the Control to generate a new view mode preview. This may be important if the referenced Attachment has changed. |
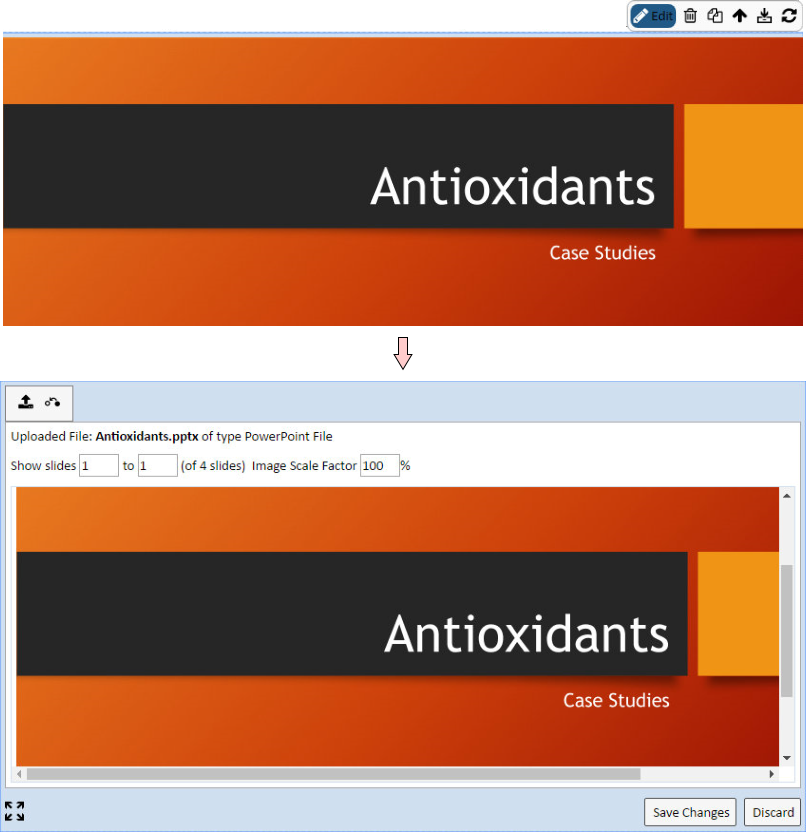
PowerPoint Files |
PowerPoint files in "View" mode can be modified by clicking "Edit".
|
The options allow control over the number of slides shown and image scaling. The defaults are configurable using the Configuration Properties.
| |
Changing these fields prompts you to regenerate the preview as shown below. You can click the link or "Save Changes" to regenerate.
| |
The icons apply to all file types:
|
|
The "Upload" icon is used to change or re-upload files. This clears the rendered file from the Control and once again displays the selection area that lets you select and upload another file. |
|
|
The "Revert" icon reverses all changes made in the view mode preview and reinserts the file into the Control to generate a new view mode preview. This may be important if the referenced Attachment has changed. |
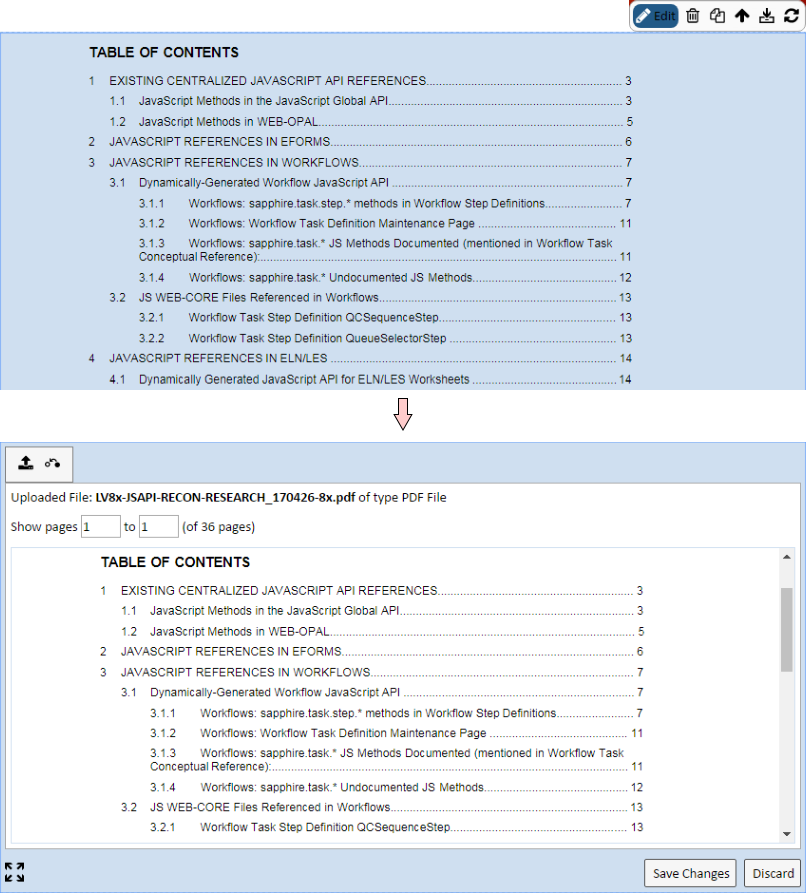
PDF Files |
PDF files in "View" mode can be modified by clicking "Edit".
|
The options allow control over the number of pages shown. The defaults are configurable using the Configuration Properties.
| |
Changing these fields prompts you to regenerate the preview as shown below. You can click the link or "Save Changes" to regenerate.
| |
The icons apply to all file types:
|
|
The "Upload" icon is used to change or re-upload files. This clears the rendered file from the Control and once again displays the selection area that lets you select and upload another file. |
|
|
The "Revert" icon reverses all changes made in the view mode preview and reinserts the file into the Control to generate a new view mode preview. This may be important if the referenced Attachment has changed. |
Configuration Properties |
|
|
These properties are available for configuring overall behavior.
| NOTE: | The maximum size of an uploaded file is determined by the "Maximum Upload File Size" property in System Configuration → Miscellaneous Options → File Management. |
| Property | Description | ||||||||||||||||||||||||||||||||||||||
| Name | Name of the Control that is displayed in the ELN interface. Leaving this blank defaults to the Control name provided in the OOB configuration. | ||||||||||||||||||||||||||||||||||||||
| Image Files | Configures upload properties for image files.
|
||||||||||||||||||||||||||||||||||||||
| Word Files | Configures upload properties for Microsoft Word files.
|
||||||||||||||||||||||||||||||||||||||
| Excel Files | Configures upload properties for Microsoft Excel Files.
When the file is first uploaded, the first sheet is displayed with or without gridlines per the configuration. You can then choose a different sheet (or all sheets) if desired. |
||||||||||||||||||||||||||||||||||||||
| PowerPoint Files | Configures upload properties for Microsoft PowerPoint
files.
|
||||||||||||||||||||||||||||||||||||||
| PDF Files | Configures upload properties for Adobe PDF files.
|
||||||||||||||||||||||||||||||||||||||
| Text Files | Configures upload properties for text files.
|
||||||||||||||||||||||||||||||||||||||
| Operations | Defines operations available on the Control
Toolbar.
See Common Control Operations for details.
|
||||||||||||||||||||||||||||||||||||||
| Includes | Allows complex/extended JavaScript to be added to an Operation of Type "Custom". |