Introduction
| Top |
|
Location Hierarchy |
Content |
||||||||||||||
|
Introduction |
|
|
To visualize a Location Hierarchy, consider your organization and the various environments you intend to monitor. Identify a structure starting with the highest level (such as a building) then work your way down to the lowest Sample Point within that building.
The corresponding structure in LabVantage is achieved by defining the highest level, then creating child locations representing each level below. When identifying the child locations, keep in mind that you will be able to group Monitor Samples according to location-based rules using Monitor Groups.
As an example, your Location Hierarchy may look like this:
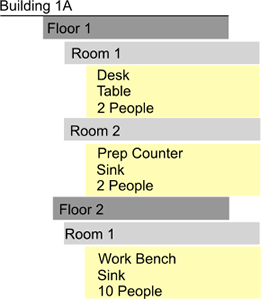
Note that you may have multiple locations with the same name, on different floors or in different buildings. As hierarchies are created, a Location path is created. This allows you to differentiate between locations (such as rooms within buildings).
The lowest level (such as Work Bench or Sink) is the point from which you will actually collect the Samples you want to monitor. These are defined as Sample Points. The following discussion provides an overview of creating the Location Hierarchy in LabVantage.
Define the Location Hierarchy |
|
|
You have two options when creating the Location Hierarchy. You can create it directly in the Location and Sample Point pages, or from within the Location Hierarchy (LV Navigator) starting with the highest level. Here we will describe using the Location Hierarchy to define the Locations and Sample Points to be monitored.
To define the Location Hierarchy directly using the Location and Sample Point pages simply create each Location, then add any Child Locations and or Sample Points.
The following discussion describes adding an entire Location Hierarchy using the Navigator.
Begin by creating a Location for the highest level, "Building 1A". Navigate to LIMS → Monitor Samples → Locations. The Location page displays.
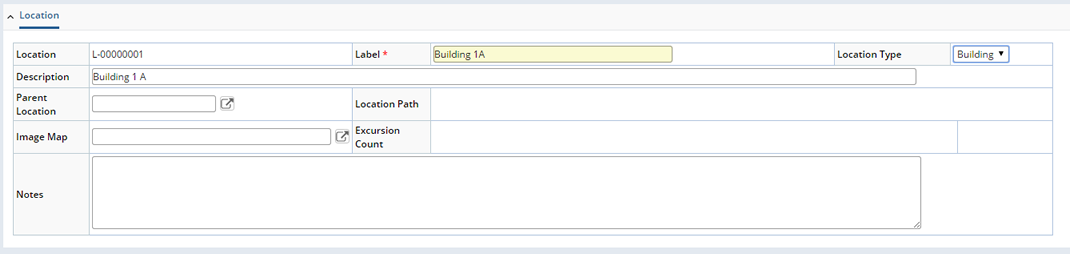
See Location for detailed information about fields on this page.
Note that the Location Id is automatically generated. This means that the Label is required to identify this Location when it is displayed in the Location Hierarchy. The Location Type is defined as "Building" and no Parent Location is selected as this is the highest level. See Locations for detailed information about the fields and operations on the Location page.
"Save" the Location and return to the Location List page.

Select the new Location and click "Manage Hierarchy". The Navigator opens with the new Location at the top level.
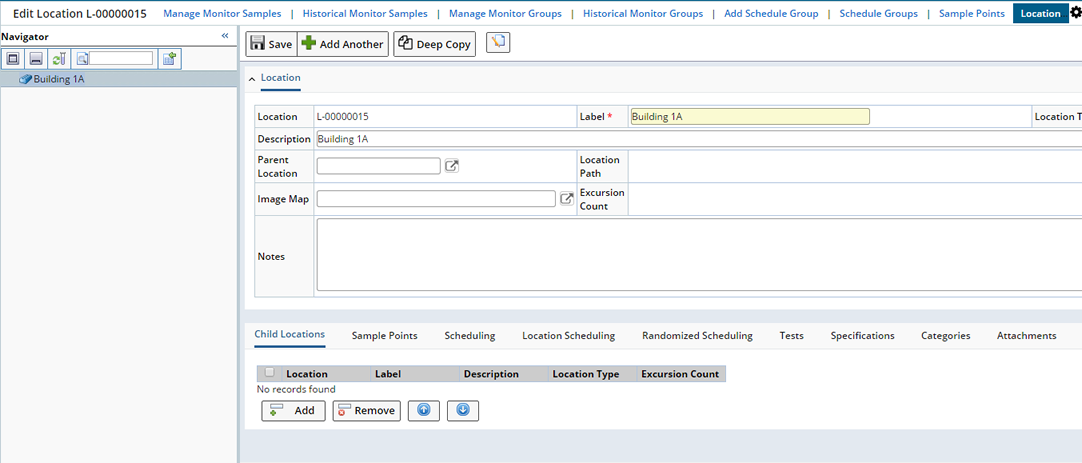
In the Child Locations detail click "Add". This adds Locations for the next level.

Click "Save". This adds the new Child Locations, Floor 1 and Floor 2 to the Location Hierarchy.
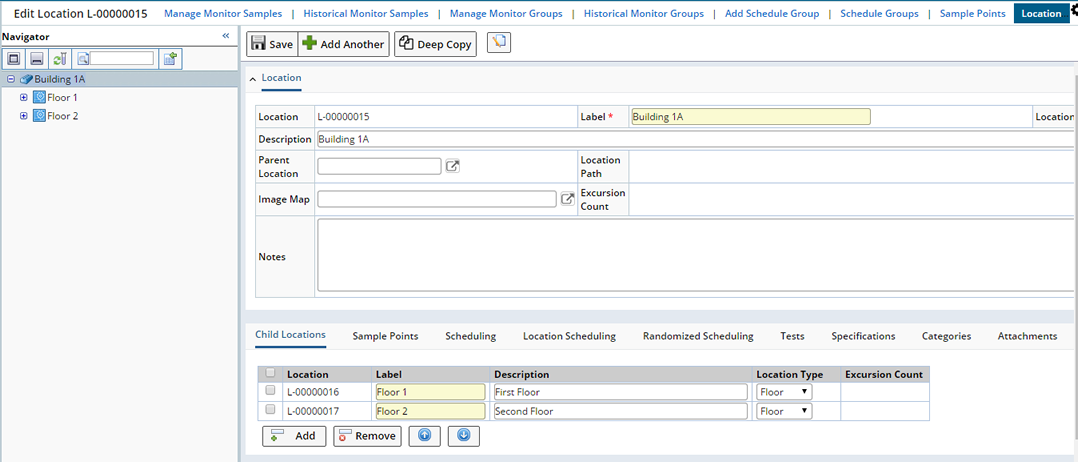
Note that Floor 1 and Floor 2 are now listed in the Navigator.
Click Floor 1. This opens the Location, where you can add the next level.
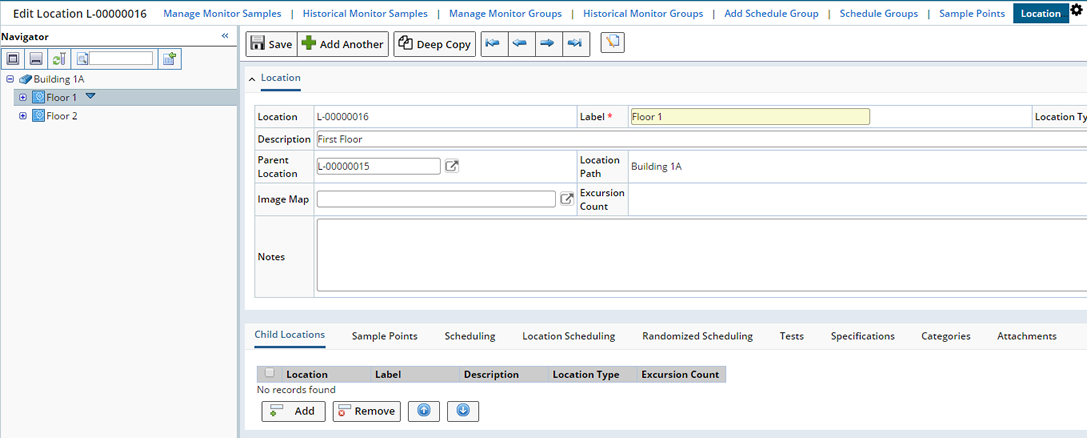
Add the next level of the Location Hierarchy, (Room 1 and Room 2) on the first floor.
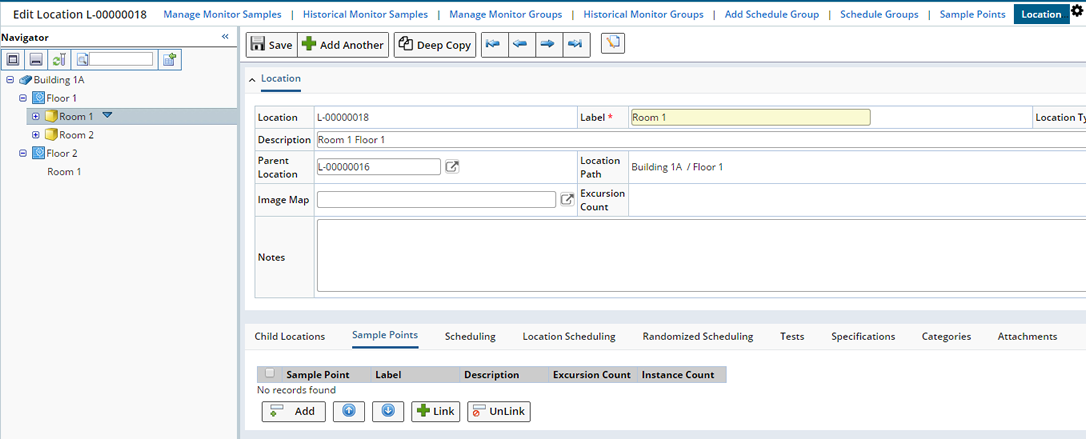
Continue to add the remaining Locations as shown in the Introduction.
The Location Hierarchy will look like this:
You can now begin to add Sample Points for each Location.
Select the Location, Room 1 on the first floor. Open the Sample Points detail. Click "Add". This adds the lowest level of the Location Hierarchy.

Note that the "Person" Sample Point is defined with an Instance Count of 2. This represents the number of people expected in this Location that require sampling. See Personnel Monitoring for more information.
Click "Save". The Sample Points now display in the Navigator.
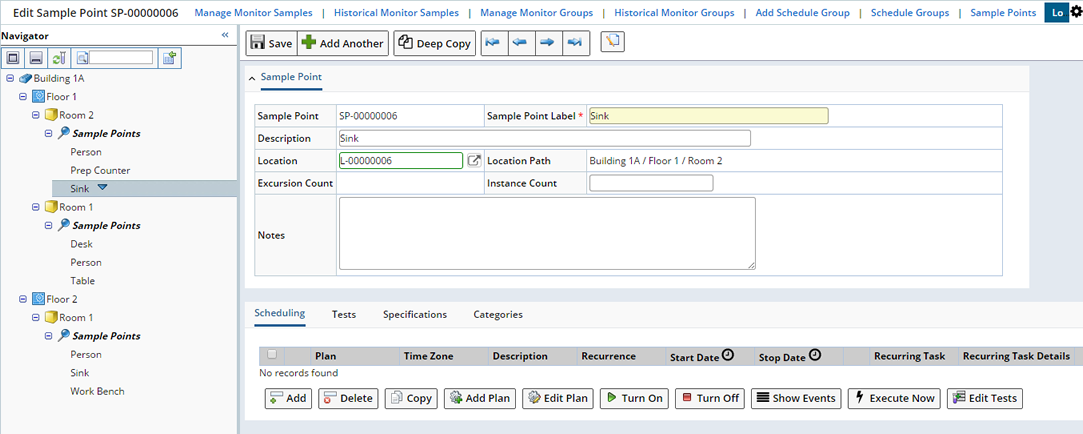
See Sample Points for detailed information about defining Schedules, Tests and Specifications.
Defining The Schedule Plan |
Now that you have defined your Location Hierarchy you can add Schedule Plans that will generate Monitor Samples for each Location and/or Sample Point (see Schedule Plans).
Deep Copy |
Should you need to create a copy of a Location or Sample Point "Deep Copy" lets you choose what to copy for Locations, and whether or not to copy Schedule Plans for Sample Points. See Locations and Sample Points for details about using Deep Copy for each.
Visualize the Location Hierarchy in the Navigator |
|
|
When you have defined your Location Hierarchy with Schedule Plans and have begun to generate Monitor Samples, you can easily visualize the status of the entire monitored structure in the Navigator. On the Location List page, find the highest level of the Location Hierarchy (Building 1A) and click "Manage Hierarchy". The Navigator opens. Selecting a lower level shows only that level and everything below.
See Excursions for a detailed discussion about Excursions.

As Samples are tested and data is entered, Samples that fall outside any specified limits (defined within the Sample Point) are flagged with an Excursion. See Monitor Samples for details about Sample Data Entry.
The Excursion Icon displays a count indicating the number of Sample Points or Locations (at or below this level) that contain failed Specifications.
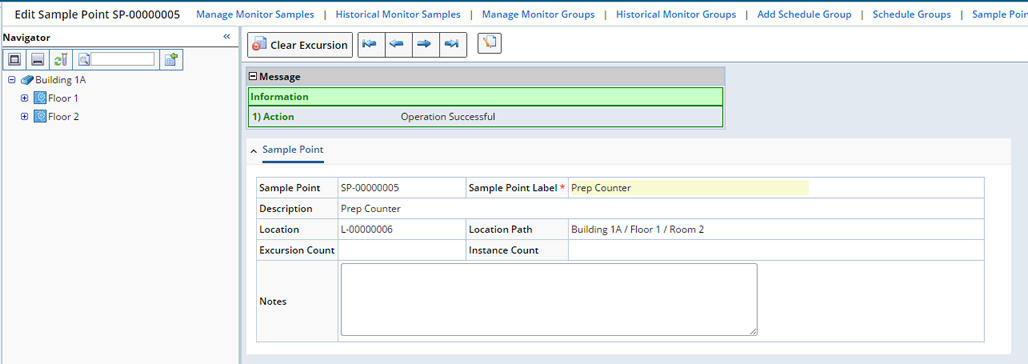
Clearing Excursions |
As you address the issue, you can manually clear the Excursion from the Location or Sample Point here in the Location Hierarchy, or from the Location or Sample Point list page.
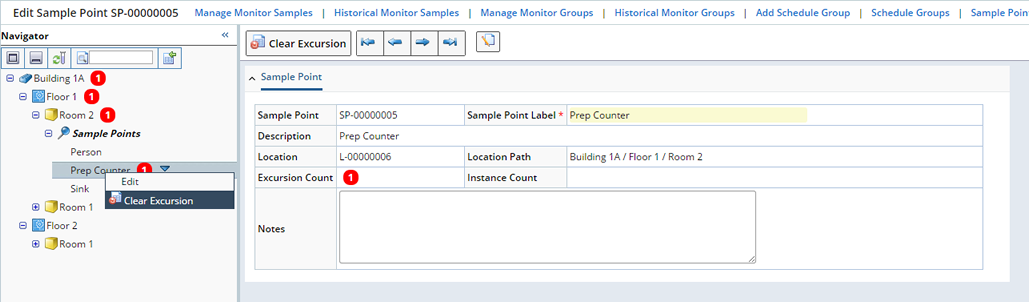
Drop down the menu for the Location or Sample Point and click "Clear Excursion".
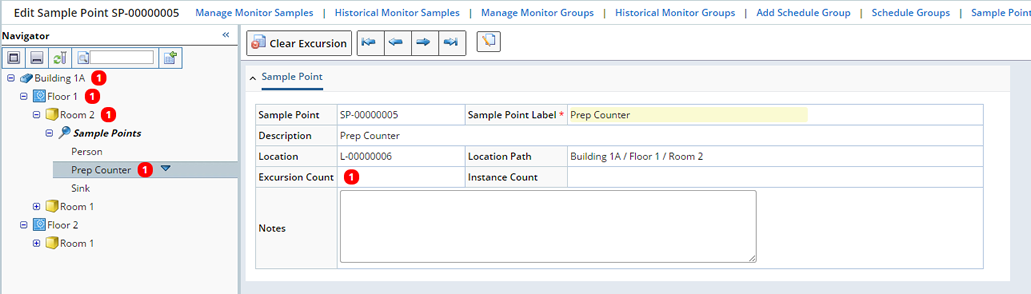
Click the "Clear Excursion" button. You are prompted for your Electronic Signature.
Note that the Excursion is cleared from the Location or Sample Point as well as all upper levels of the Location Hierarchy.