Overview
| Top |
|
Move Samples (Custodial Management) |
Overview |
|
|
You may find that you need to move Biobanking Samples, either internally between departments or Users, or to an external location. This document describes the different Biobanking Sample movement options and the Department and User setup needed to manage this movement.
| • | Take Custody
Allows you to take (or force) custody of a Sample. |
| • | Transfer
Lets you transfer custody of Samples between internal Departments in close proximity (does not require shipping). Samples might be placed in a Transit location until the receiving Department receives them. |
| • | Ship to an External Location
Create a Package to be Shipped to an internal or external Shipping Location. |
User and Department Setup |
|
|
When moving Biobanking Samples internally or externally LabVantage checks User and Department requirements to ensure a User is authorized to move the selected Samples. Associating Users with Custodial Departments lets you control who can move Samples, and to where.
Samples received in LabVantage are assigned to the Default Custodial Department of the User receiving the Sample. This becomes the Sample's Default Custodial Department.
User and Department Setup determines a User's ability to move a Sample within LabVantage.
Users |
To move Samples in Biobanking Users must meet these requirements.
| • | Contact Information must be defined in User Preferences. Right click the User icon in the upper right of the Layout, choose "Change Preferences" then add the Contact Information. |
| • | The User moving a Sample must be a member of the Sample's Custodial Department. |
Custodial Departments |
The "Custodial Department" defines a functional area within your organization through which a Sample moves. In Biobanking create Custodial Departments to control Sample movement between both internal departments and external departments (Shipping Locations). Within a Custodial Department define member Users. These are the Users you want to be able to obtain Custody of Samples.
As Samples arrive, the Custodial Department of the User receiving the Sample becomes the Sample's default Custodial Department. Other Users who are members of this Custodial Department are also eligible to obtain custody of these Samples. If the User unpacking a Package or taking a Sample out of Storage is not a member of the Sample's Custodial Department they will not be permitted to perform the operation.
When transferring custody of Samples (Transfer) the User sending the Sample must be a member of the Sample's Custodial Department (source Department) and the User receiving the Sample must be a member of the destination Department's Custodial Department.
If one User is moving the Samples they must be a member of both the source and destination Custodial Departments.
Storage Location |
Storage Locations are enumerated as logical Physical Stores, where one physical Freezer may have more than one logical Physical Store. This allows one physical Freezer to be apportioned to multiple Custodial Departments. Every logical Physical Store exists within one (and only one) Custodial Department. Users must be a member of the Storage Location's Custodial Department to move Samples to and from the Storage Location.
Take Custody |
|
|
Take Custody lets Users take, or force custody, of a Sample regardless of a Sample's Custodian or Custodial Department (unless restricted by Role in the Take Custody Page Type). Should a User find themselves in possession of a Sample not assigned to their Custodial Department they can force custody to their Custodial Department. As a result, the Sample could be assigned to a new Custodial Department, thus avoiding the Package or CDT process for transfer of materials between Custodial Departments.
Taking Custody |
You can Take Custody of Samples (or Boxes, Arrays) from the following pages:
| • | Data Entry Samples List |
| • | Lab Operations Samples List |
| • | Admin Sample List |
| • | Storage Explorer |
| • | Box List |
| • | Sample Movement |
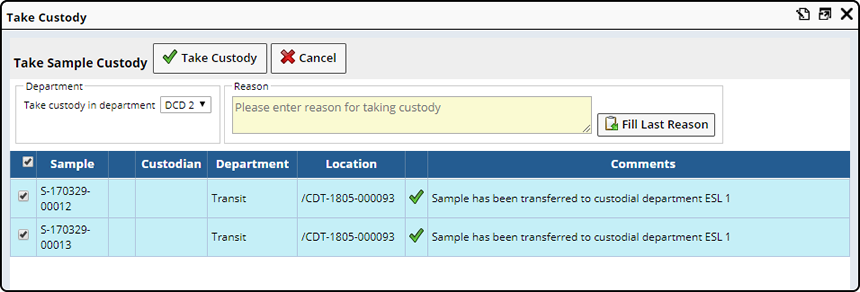
Selecting the Sample(s) and clicking "Take Custody" opens the Take Custody dialog. Each selected Sample is verified, a Comment lists the state of the Sample according to LabVantage.
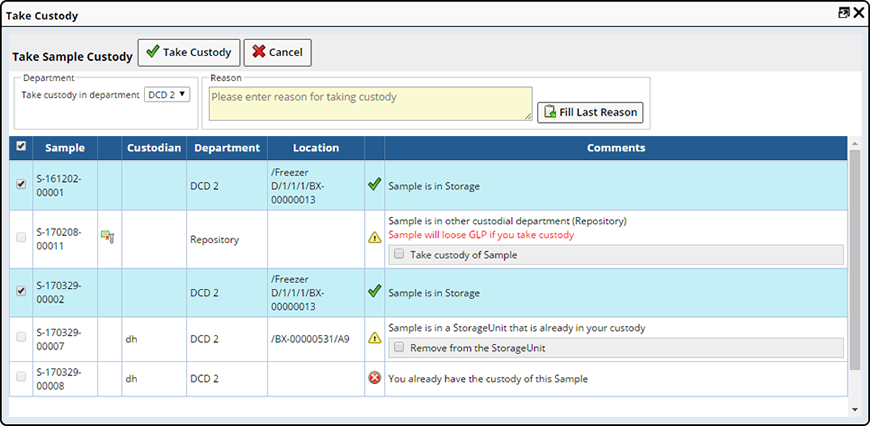
If you are a member of multiple Departments, choose into which Department you want to take custody of the selected Samples. You must enter a reason for taking Custody. The "Fill Last Reason" button is a convenient way to recall the last reason entered. This is useful if, for example, you are performing the same operation multiple times and want to use the same reason each time. The system remembers the last audit reason for each user, but the reason is not retained between successive logins.
Within the Comments section, a description is provided indicating whether or not custody can be taken.
| Status | Description |
|
|
Custody of the Sample can be taken. The Sample is automatically selected. |
|
|
Additional information about the state of the Sample is provided. Confirmation is required before custody can be taken. Once "Take Custody of Sample" is checked the Sample is selected. |
|
|
No action will be taken on the Sample. Either you cannot take custody of the Sample or you already have custody. You will not be able to select the Sample. |
When taking custody of a Sample that has been filed into a Storage Location, the "Clear Location" option is provided. If you want to clear the Storage Location, leave "Clear Location" checked. To reserve the location, uncheck "Clear Location".
![]()
With the Samples you want to take custody of selected, click "Take Custody". Custody of the Sample(s) moves to the current User.
| NOTE: | When taking custody of an Array, custody of the embedded Samples is not changed (as the Array is not the primary Storage Location for a Sample). |
Configure the Take Custody Dialog |
Use the Take Custody Page Type to configure the columns displayed in the Take Custody Dialog.
Transfer |
|
|
Transfer lets you move Samples between internal departments that are in close proximity and do not require shipping. Samples can be placed in a specified location (transit) until the destination Department receives them. You can perform a Transfer from the following pages:
| • | Data Entry Samples |
| • | Lab Operations Samples |
| • | Admin Samples |
| • | Sample Movement |
| • | Box List |
From any of the list pages select one or more Samples and click "Transfer". The Transfer Dialog opens.
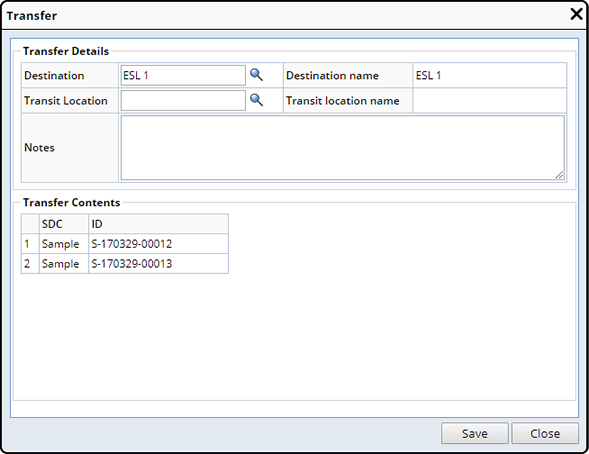
Using the Lookup, choose the Destination Department and optionally a Transit Location. The Transit Location is the Location from which the Destination Department will receive (pick up) the Samples. The Transfer Contents tab displays the Samples included in this Transfer.
Click "Save" to create the CDT. A confirmation message identifies the new CDT Package. A Location Path indicates the Samples are within a CDT Package.
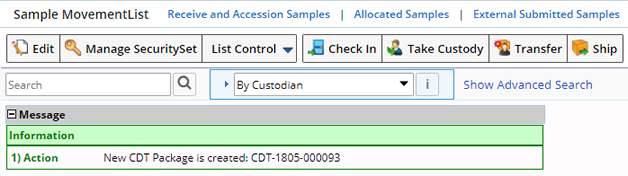
A Location Path indicates the Samples are within a CDT Package.

If Departmental Security is enabled, the Sample's securitydepartment is set to the Destination Department when the CDT Package is created. Once the CDT is complete the status of the CDT becomes "Shipped".
Receiving a CDT Package |
Users who are members of the Destination Custodial Department can "Take Custody" of CDT Packages listed on the Sample Movement list page.
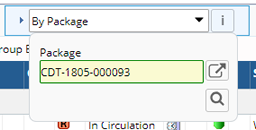
Use the Package query to find the CDT Package.
Samples included within the CDT Package display.

Select and "Take Custody" of the Samples.
CDT Packages Lifecycle |
"CDT" Packages experience the following life cycle:
| Operation | Description | Sample/Package Status Transition | ||||||
| Create CDT | Perform a Custodial Department Transfer (CDT), which:
|
Received (selected Sample) → Shipped
(Package)
In Circulation (selected Sample) → Shipped (Package) Temporary In Lab (selected Sample) → Shipped (Package) |
||||||
| Take Custody of CDT | A User in the Destination Custodial Department receives (using the Take Custody operation) the transferred Samples into their Department. | Shipped → Emptied |
Ship |
|
|
Use Ship when you need to Ship items (such as Samples, Boxes, Plates or Arrays) to an internal or external location (an actual shipment is created and the Samples are transported to the internal or external location). Ship is available from the following pages.
| • | Lab Operations Samples |
| • | Box List |
| • | Plate List |
| • | Sample Movement |
| • | Plates and Gels List |
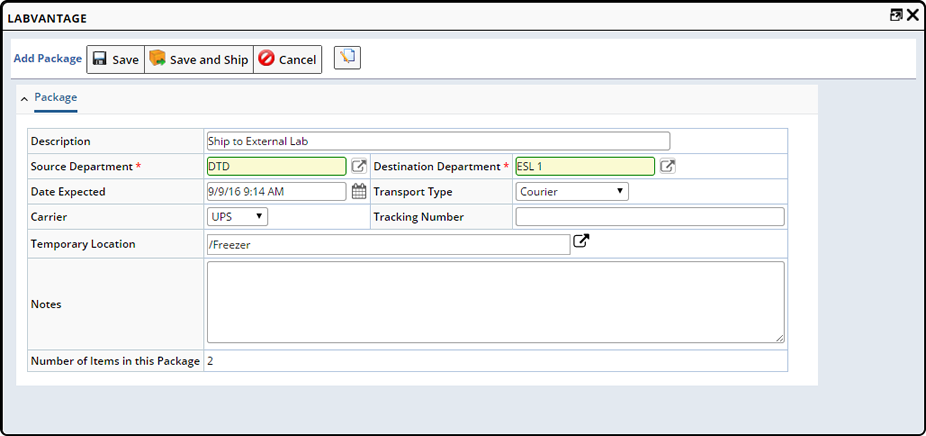
From any of the list pages select the items you want to Ship and click "Ship". The Add Package dialog displays.
| Field | Description |
| Description | Text description of the Package. |
| Source Department | Identifier of the Custodial Department from which the Package is shipped. Defaults to the User's default Department. |
| Destination Department | Identifier of the Custodial Department or Shipping Location to which the Package is shipped. |
| Date Expected | Date the Package is expected to arrive. |
| Transport Type | Mode of transport by which the Package is sent. |
| Carrier | Carrier who will ship the Package. |
| Tracking Number | Tracking number for the Package. |
| Temporary Location | Temporary Location in which the Package is Stored until shipped. |
| Notes | Textual notes. |
| Number of Items in this Package | Displays the number of items or specimen (such as Samples, Boxes, Plates or Arrays) included in the Package. |
When you are finished defining the Package choose to either Save the Package for later shipment or Save and Ship the package immediately.
If you might want to make changes to the Package contents before shipping (such as add additional content) simply Save the Package. A Package is created with a status of "Created". You will need to go to the Package List page to Ship the Package when shipment occurs.
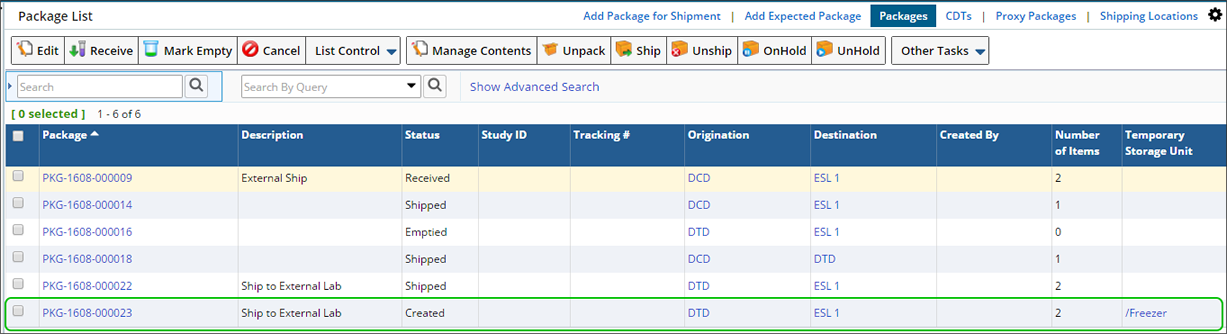
Save and Ship creates, then ships the Package immediately.
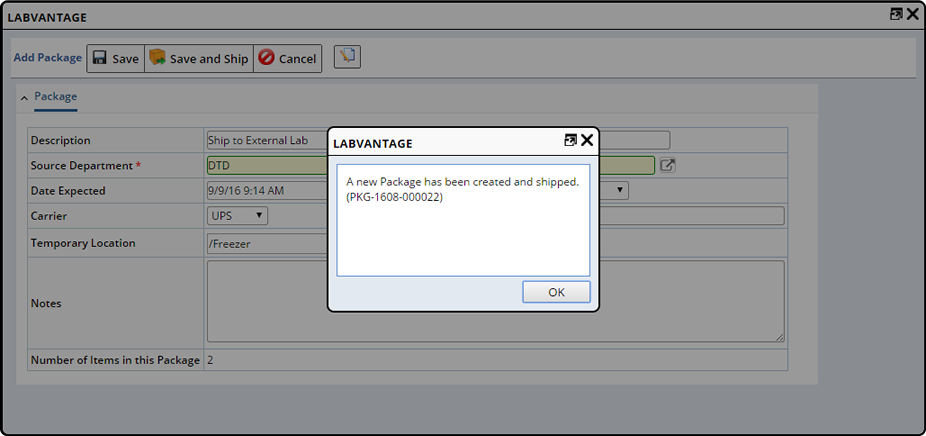
The Package status is "Shipped". See Packages for information about managing existing Packages.
The selected Samples are listed in the Contents Detail of the Package.
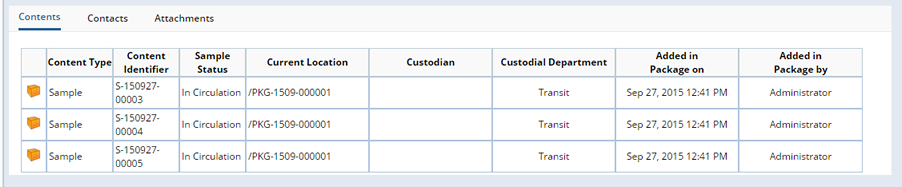
| Package Content | Description |
| Sample | Samples are stored directly in the Package. |
| Box | Samples are stored in the Box. The Box is stored in the Package. |
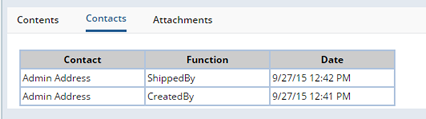
After saving, the Contacts detail element shows the Contact for the Custodial Department.
|
|