Overview |
|
|
Overview |
|
|
After an Array is loaded, it can either be sent to an Instrument for testing, or you can enter data manually (directly onto the Array). Before performing Data Entry, you must have included testing Parameters for raw data and aggregate calculations in the Array Method.
Each Array Item has an SDIData structure that is defined in the Parameters tab on the Array Method (not a Parameter List). When Data Entry is performed (either by an instrument or manually), it is performed against these Data Items. When the Array is loaded and an Array Method is applied, the Content and Parameter information is copied to the Array Items. The Parameters defined in the Array Method are added to the Array Item and Array Zone SDIs as sdidata datasets.
Sending an Array to an Instrument |
|
|
From the Array List page, select the Array you want to send, then click "Send to Instrument":
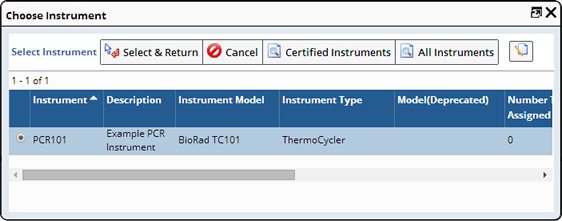
The Select Instrument dialog opens. By default, all certified/calibrated instruments of the Instrument Type defined in the Array Method are presented. If you have permissions to view the uncertified/calibrated instruments, you can click the All Instruments button to show all instruments that are of the Instrument Type defined in the Array Method whether certified or not.
Choose the Instrument you want to use. LABVANTAGE sends the Array to the Instrument. Once sent to the Instrument, the Array status becomes "Sent to Instrument".
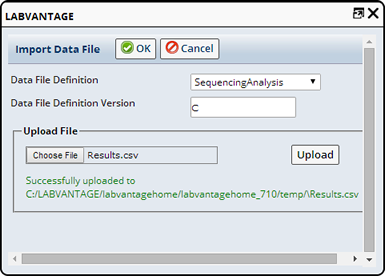
When results are ready, you will need to Upload the data file back to the Array. On the Plates and Gels List page, click "Upload Results". The Import Data File dialog opens:

A Data File Definition task imports the Array results from the instrument to LabVantage. Specify the Data File Definition and Version, then choose the results file to upload.
Click the Choose File button to open a client side file browse dialog and select the data file to upload. Clicking the Upload button uploads the client file.
If not already chosen, the Data File Definition must be selected to match the type of data file being uploaded. By default, leaving the version number as C, will automatically choose the current or latest version of that Data File Definition.
When the file is successfully uploaded, the Array Status changes to "Data Entered" or "Completed" depending on whether the "Promote Results To Unknown" flag is set to Automatic or Manual in the Array Method.
Once uploaded you can view the data using the "View" button on the Plates and Gels List page, or go through the process of Reviewing the Array (QC Review), where you can approve or reject all or part of an Array. See QC Review for details about viewing Array Data.
Manual Data Entry |
|
|
Typically, Array Data Entry is an automated process by "Uploading Results" just described, or a background automatic posting of results when automation is used. However, there may be cases where manual data entry is required when there is no instrument connectivity. Provided is the ability to not only manually enter the ArrayItem results, but also to enter the aggregate ArrayZone results.
Clicking Manual Data Entry on the Plates and Gels List page opens the Array Data Entry page. Here you will see a Data Entry grid representing an entire Array:
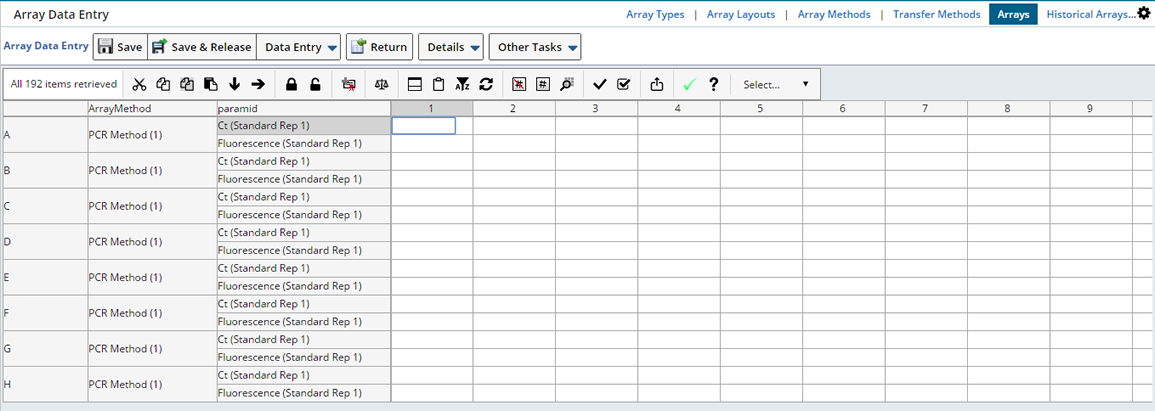
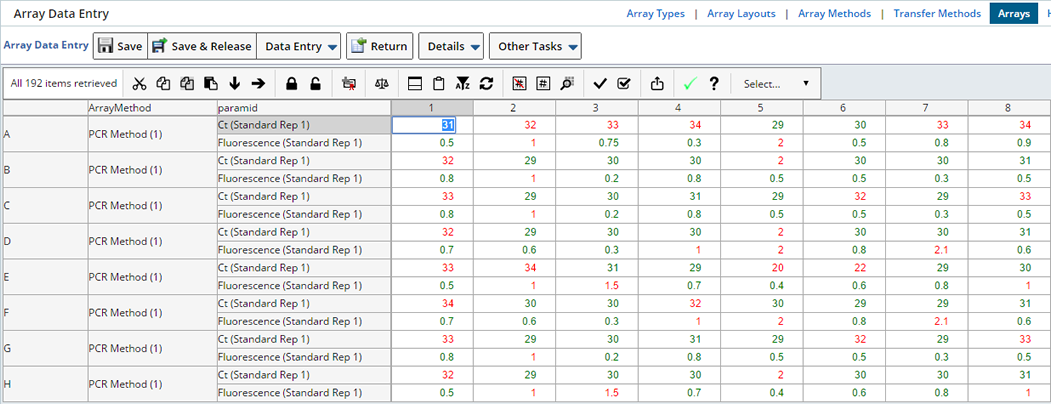
Enter values for each Array Item. See Data Entry for information about the Data Entry page. When you have multiple parameters per ArrayItem, you will see that they all appear. You may elect to filter the array data entry page to limit yourself to a single parameter at a time. Click the Funnel icon on the dataentry toolbar.
When you have finished entering data click "Save" or "Save and Release". The data are saved in the Array and the Array Status changes to "Data Entered" or "Completed" depending on whether the "Promote Results To Unknown" flag is set to Automatic or Manual in the Array Method. Any calculations that have been performed are displayed in the Array.
Zone data is generally aggregate information from what was recorded in each ArrayItem. There are two options for Zone Data Entry:
| • | LABVANTAGE can calculate the Zone data from the entered individual ArrayItem values. |
| • | Instruments can provide the aggregate information about the Zone. In this case LABVANTAGE need not express the calculation. |
Zone data may also be uploaded similarly to the ArrayItem Upload. Alternatively, you can use the Manual Zone Data Entry to specify the Zone data.
Clicking Zone Data Entry opens a Data Entry page where you can manually enter Zone data.
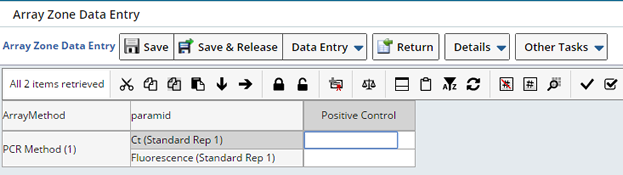
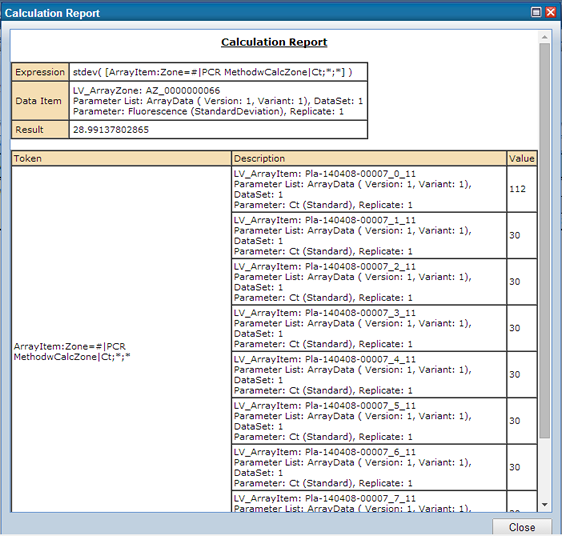
When performing data entry or while viewing data entered you have the option to view the actual calculations performed. While on the Data Entry page, select a Data Item and click "Calculation Report".
Array Action Examples |
|
|
Array Management OOB Actions provide additional options for content management and data mapping. See Array Management API Usage Examples for various examples designed to help you understand the capabilities of these Actions and their usage scenarios.