Options for Creating Protocols |
|
|
|
Stability Protocols |
Content |
||||||||||||||||||||||||
|
There is no shortage of options for creating Protocols:
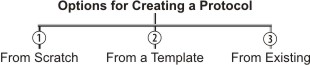
| • | From Scratch lets you create a new Protocol from nothing. | ||||||
| • | From Existing creates a Protocol from an Existing Protocol. | ||||||
| • | From a Template creates a Protocol from an existing Protocol
Template. A Protocol Template is a convenience that lets you reuse
the Template as many times as required without having to create a new
one. This is the most flexible approach to creating Protocols. The example
in this section shows how to create
a Protocol Template, as this option uses the same interface as creating
a Protocol from scratch.
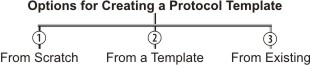
Creating a Protocol Template also brings with it three options:
|
Regardless of the option you choose, creating a Protocol or Protocol Template From Scratch always opens the Edit Protocol Page for this purpose.
Creating a Protocol Template |
|
|
Like Plans, the most flexible approach to creating Protocols is to create a Protocol Template, then reuse it as needed.
Choose the Protocol Templates menu item. The Protocol Template List Page opens.
In the Protocol Template List Page, click "Add".
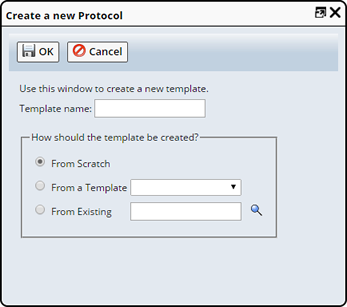
In the dialog:
Supply a Template Name. This is an identifier for the Protocol Template.
Choose how the Protocol will be created:
| • | From Scratch lets you create a new Protocol. Clicking "OK" will open the Edit Protocol Page for this purpose. |
| • | From a Template lets you choose an existing Protocol Template. Clicking "OK" creates the Template, creating a "Template from a Template". |
| • | From Existing lets you choose an existing Protocol. Clicking "OK" creates the Template from the existing Protocol. |
The menu item switches from Protocol Template to Protocol, and the Edit Protocol Page opens. This is where you setup your Protocol.
Creating a Protocol |
|
|
Choose the Protocol menu item. The Protocol List Page opens.
In the Protocol List Page, click "Add".
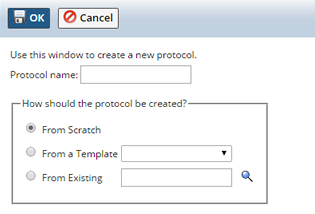
As described in Options for Creating Protocols, you have three choices. In the dialog:
| a. | Supply a Protocol Name. This is an identifier for the Protocol. | ||||||
| b. | Choose how the Protocol will be created:
|
Editing Protocols |
|
|
As shown in Fundamental Relationships, a Protocol associates Plans with Products. The Edit Protocol Page is where you make these associations.
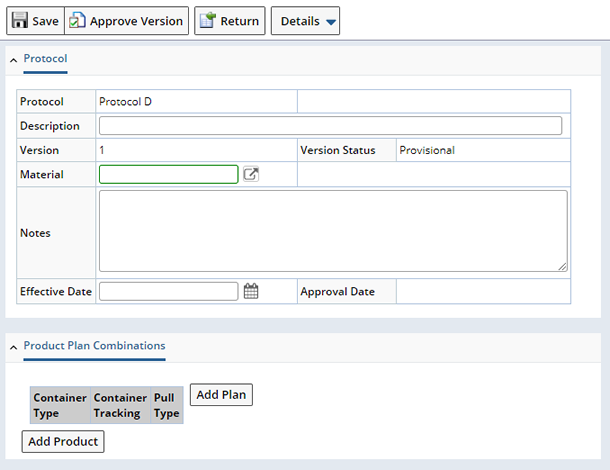
Specify Protocol management details.
| Field | Description |
| Protocol | Shows the identifier you assigned during creation. |
| Description | Enter a text description if desired. |
| Version | Shows the Version number. |
| Version Status | Shows the Version Status. |
| Material | If you want to associate a Material with the Protocol, click the lookup icon and choose one. |
| Notes | Enter text notes if desired. |
| Effective Date
Approval Date |
See Concepts of SDI Versioning and Approval. |
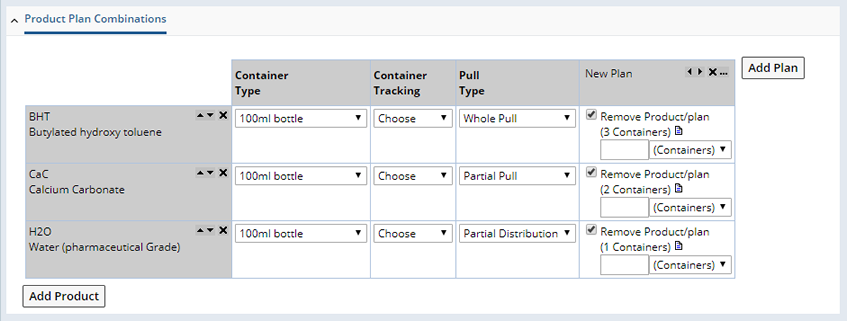
Product Plan Combinations |
In the Product Plan Combinations detail you can associate testing Plans with Products.
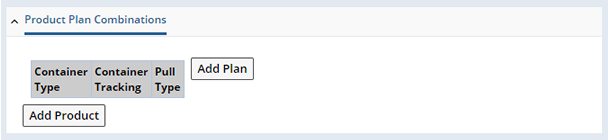
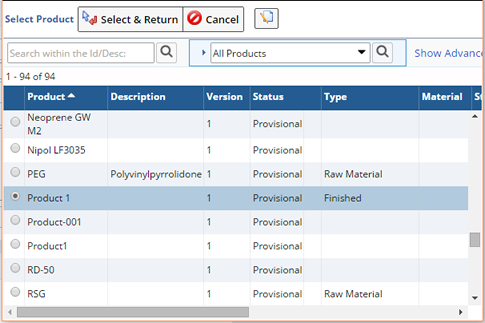
Click "Add Product". then choose the desired Product from the Lookup page. Note that you can locate Products by Search or Query (you may have more or less Queries than shown in the example below).
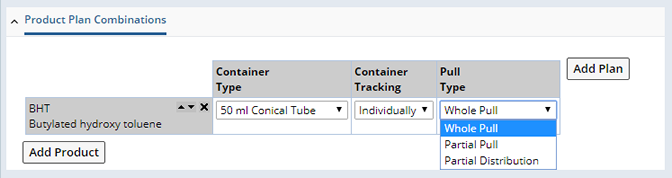
For the Container Type, choose the container you will be using for this Product. Define the size and the unit of the Container. Container is needed to get the material for the pull tasks.
Based on the size of the selected Container Type the total number of Containers (needed for the pull tasks) is derived during inventory calculation (see Stability Inventory Calculation).

Container Tracking lets you determine how you want to track the Containers in their respective Storage Locations. Use of this feature requires familiarity with Trackable Items and Storage Locations. If we now divert to an explanation of these arcane concepts, we may never finish explaining Protocols.
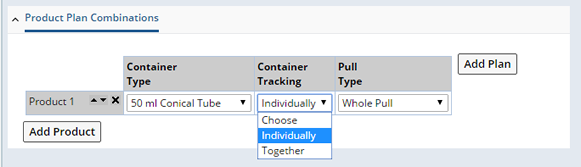
So, suffice it to say that...
| • | Together creates a single Trackable Item. For example, if the Total Pull Quantity consists of 4 Containers, tracking them Together creates a single Trackable Item. |
| • | Individually creates a Trackable Item for each Container. If the Total Pull Quantity consists of 4 Containers, tracking them Individually creates 4 Trackable Items. |
When you create a Study Request, the Plan Form on the Study Page contains a Storage and Quantities section where you can assign the single or multiple Trackable Items to a Storage Location.
The Type of Pull (Product from container) permitted. Choose Whole Pull (for each distinct laboratory), Partial Pull or Partial Distribution.
| Option | Description |
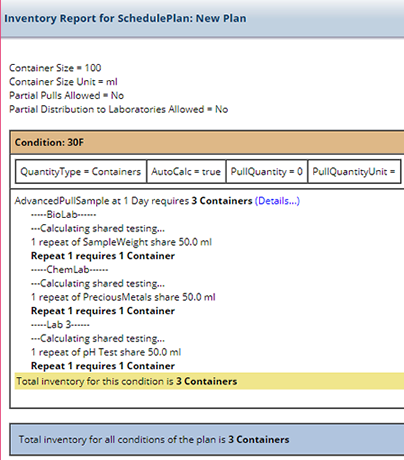
| Whole Pull | Whole Pull requires that the entire container is pulled for each distinct laboratory. |
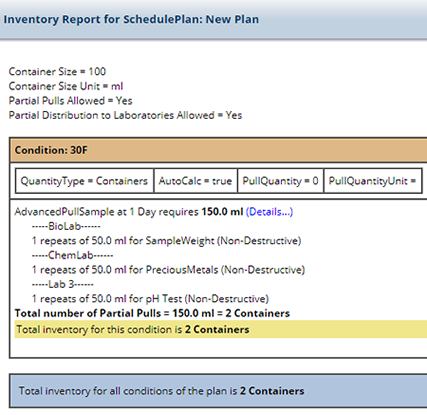
| Partial Pull | For partial pull it is assumed that one is permitted to open a container, take out some raw material, and leave the container in storage for a future pull. Partial pull is applicable for the cases when either the material is expensive, or for blister packs, when a subset of a container is pulled. |
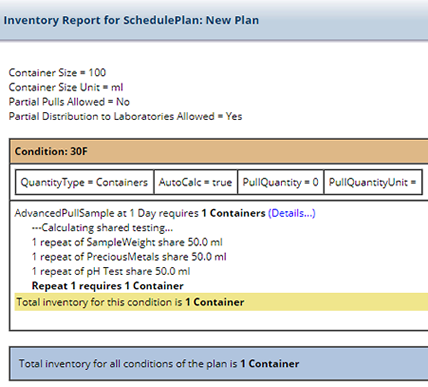
| Partial Distribution | Partial Distribution is the pull of Whole containers, but the required fractional amounts are distributed (shared) between the different laboratories (similar to Partial Pull when creating Samples for distinct laboratories). |
The total number of containers is determined by dividing the total raw material by the container size. See Calculations Based on Pull Type for information about how container information is calculated based on Pull Type.
| NOTE: | Unit Validation is performed throughout Stability. When a Container is specified at the Plan/Product combination level of a Protocol, all Units of the Plan will be validated against the Container unit. See Stability Unit Validation for more details about Unit Validation. |
Adding Plans |
This associates a Plan with the Product you have added above.
Click Add Plan.

In the dialog:
| a. | Supply a Plan Label. This is an identifier for the Plan. | ||||
| b. | Choose how the Plan will be created:
|
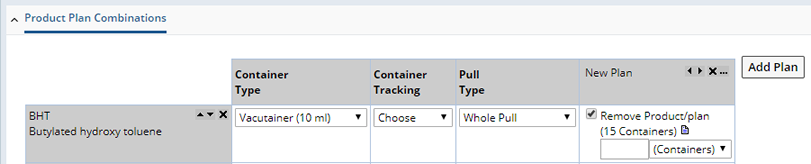
To associate the Product with the Plan, click "Add Product/Plan". If the Plan has already been built and contains Pull Sample Tasks, the display expands to show information regarding pull quantities (also note that the total pull quantity of the Plan is shown in the header). Here's an example:

Automatically Calculating Containers |
The total number of containers needed for each Plan is auto-calculated and displayed, provided that the auto-calculation flag is checked in the "Add Condition" window during Plan creation.
Upon changing properties like the container size (in Container Type dropdown), or changing the Pull Type, the Protocol recalculates the recommended number of containers for each Product/Plan combination.
| Before changing properties | |
|
|
|
| After changing properties | |
|
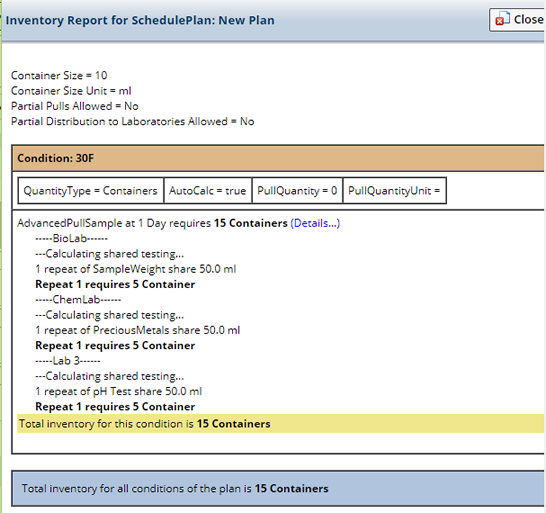
Clicking the icon to the right of the calculated number of containers opens the Inventory Calculation Report showing how
the number of containers is calculated.

An example of the Inventory Report is shown below. For details, see Stability Inventory Calculation.
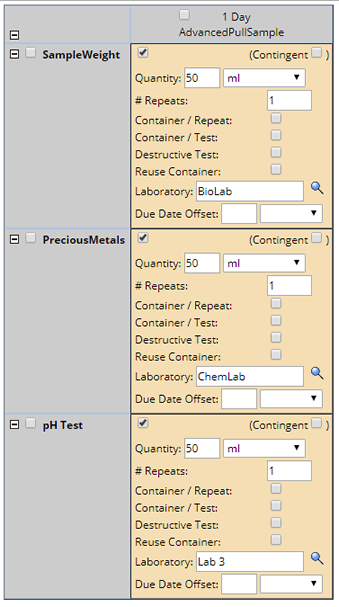
Use the following example to compare the different calculations performed, based on the Pull Type selected.
| The Plan requires three tests, each requires 50 ml, each within a different Lab. | The available Container Type is the same for each, 100 ml bottle. Note the change in required number of containers depending on the Pull Type. | ||
|
|
The Inventory Report (click the![]() icon) provides details about the calculations performed.
icon) provides details about the calculations performed.
| Whole Pull | Partial Pull | Partial Distribution |
|
|
|
If you want to disassociate a Product from a Plan, click "Remove Product/Plan" (un-check).
Protocols are versioned:
| Version Status | Description | ||||
| Provisional |
|
||||
| Current | "Current" indicates a Protocol is "approved for use". | ||||
| Active | "Active" Protocols are "Current" Protocols that are no longer used. |
Creating New Protocol Versions |
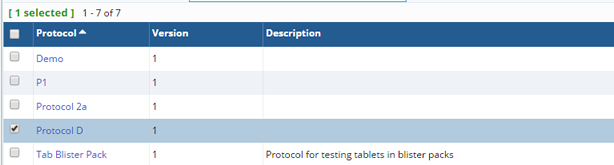
On the Protocol List Page, New Version loads the Edit Protocol Page for that Protocol and increments the Version number. In the example below, we requested a New Version of the Provisional protocol02.
After exiting the Edit Protocol Page, we returned to the Protocol List Page. The Version number of protocol02 was incremented from 1 to 2.
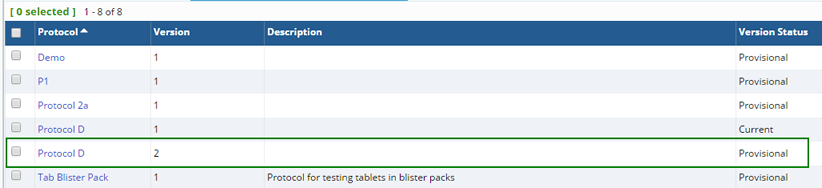
If you create a new Version of a Current Protocol, the new Version is Provisional.
Approving Protocol Versions |
To approve Protocol Versions, use Approve Version in the Toolbar of the Edit Protocol Page.
Only Provisional versions can be approved. Choose the version, then click Approve Version. Operation is as follows:
| • | When approved, the Provisional version becomes Current. | ||||||||||||||||||||||||
| • |
If a Current version already exists, that version becomes Active. In the example below, if you approve version 2...
...version 3 becomes Active, and version 2 becomes Current.
|
Approve Version opens the Electronic Signature Page, which prompts for a password and reason.